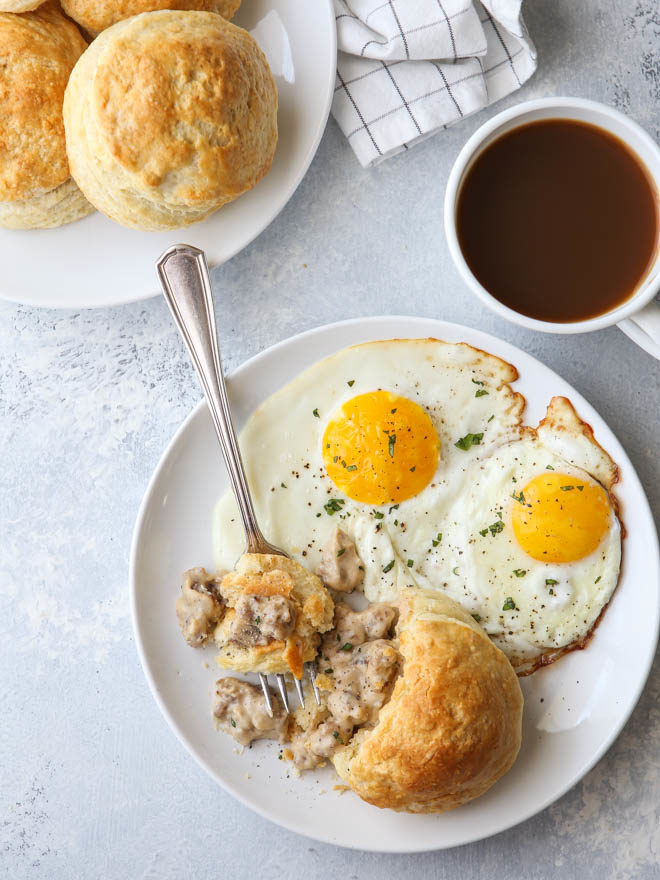
Sausage Gravy Stuffed Biscuits
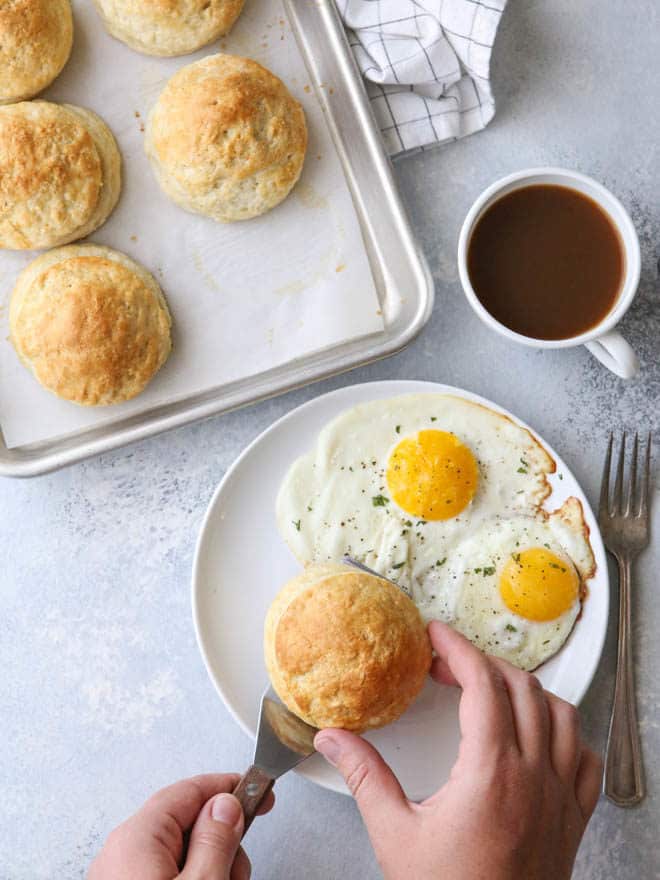
These buttermilk gravy biscuits stuffed with creamy sausage gravy are a fabulous twist on a classic. Plus they’re both freezable and portable – perfect for busy weekday mornings!
This post is sponsored by Challenge Butter.
We’re one week into the school year and I’m still trying to find my morning groove. Right now I pretty much run around like a crazy person trying to get everyone ready for the day before 8am. We’ve been used to lazy breakfasts, morning cartoons, and pjs till we feel like getting dressed. But nope, we can’t do that anymore!
Please tell me it gets easier?
Last week I shared my homemade buttermilk pancake mix, and this week I have another shortcut breakfast recipe for you— sausage gravy stuffed biscuits!

These stuffed biscuits are just my biscuits and gravy recipe with a few tweaks. It took me a couple of tries to get it right, but they totally work. Gravy on the inside, how fun is that? My kids loved them!
And more importantly, making biscuits and gravy this way means they’re now FREEZABLE and PORTABLE. Game-changer!
Keep these gravy stuffed biscuits in the freezer for busy mornings. Just a few minutes in the microwave and bam!, you’ve got a hearty homemade breakfast on the table. Or if you’re running late, just take them with you! My husband loves that he can grab one on his way out the door.
Recently I spent some time in the freezer aisle of my grocery store looking at breakfast options and let me tell you, they are not great. Lots of sugar, preservatives, and other odd ingredients. And that’s part of why I created these gravy stuffed biscuits, and why I’ll explore some other freezable homemade options.
These biscuits and gravy are made with only 10 total ingredients. And I feel good about using Challenge butter because it’s made with fresh, hormone-free milk from well-cared for cows, and it’s also free of artificial flavors, dyes or fillers. Using high-quality ingredients is so important to me, and I love knowing that Challenge cares about that too.
baking tip:How to freeze biscuits
- Completely cool biscuits.
- Cover tightly with plastic wrap.
- Place wrapped biscuits in a heavy-duty zip-topped plastic bag.
- Label with the name of the recipe and date.
- Store in the freezer for up to 1 month or more. Longer storage may affect flavor.
(You can also use this same method for freezing scones and shortcakes.)

Sausage Gravy Stuffed Biscuits
Ingredients
Sausage Gravy:
- 8 oz bulk country breakfast sausage (227 grams)
- 2 tablespoons Challenge butter
- 2 tablespoons all-purpose flour
- 1 ¼ cup milk (310 ml)
- ½ teaspoon coarse salt
- ¼ teaspoon ground black pepper
Buttermilk Biscuits:
- 2 ½ cups all-purpose flour (300 grams)
- 1 tablespoon baking powder
- ½ teaspoon baking soda
- ½ teaspoon coarse salt
- ½ cup Challenge unsalted butter , cold and cubed (113 grams)
- ¾ cup + 2 tablespoons cold buttermilk (215 ml )
- 1 large egg + 1 teaspoon water ,for egg wash
Instructions
To make the gravy:
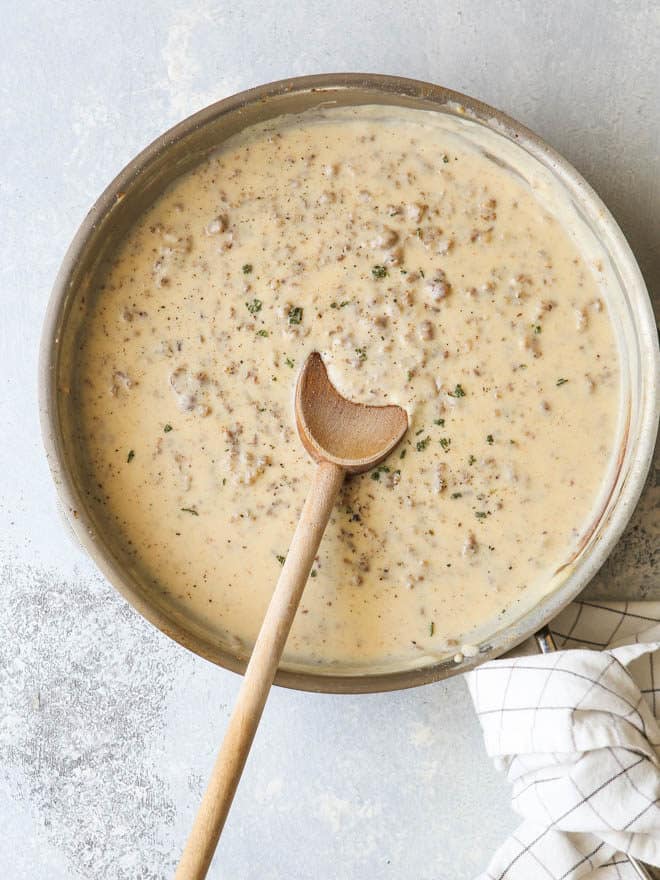
- In a skillet over medium-high heat, brown sausage until cooked through, breaking up the sausage into small pea-sized pieces as it cooks. Transfer to a paper towel-lined plate to drain.
- Melt butter in skillet. Add flour and whisk until combined. Add milk a little at a time while whisking constantly until all milk is incorporated and gravy is smooth.
- Season with salt and pepper to taste. Cook 1-2 minutes until gravy is thickened. Stir in sausage.
- Chill in the freezer for about 15 minutes while you prepare the biscuits.
To make the biscuits:
- Preheat oven to 400 degrees F. Line a sheet pan with parchment paper or grease lightly with butter.
- Combine the butter, baking powder, baking soda, and salt in a large bowl. Add the cold cubed butter and use a fork or a pastry blender to cut the butter into the dry ingredients. Mixture will look very crumbly.
- Add buttermilk and use a spoon and then your hands to bring it together. Dump the mixture out onto a clean surface and knead it a few times to incorporate any dry bits. (Mixture will look very dry after you add all the buttermilk milk and you may be tempted to add more, but if you work it with your hands for a bit, it'll come together.)
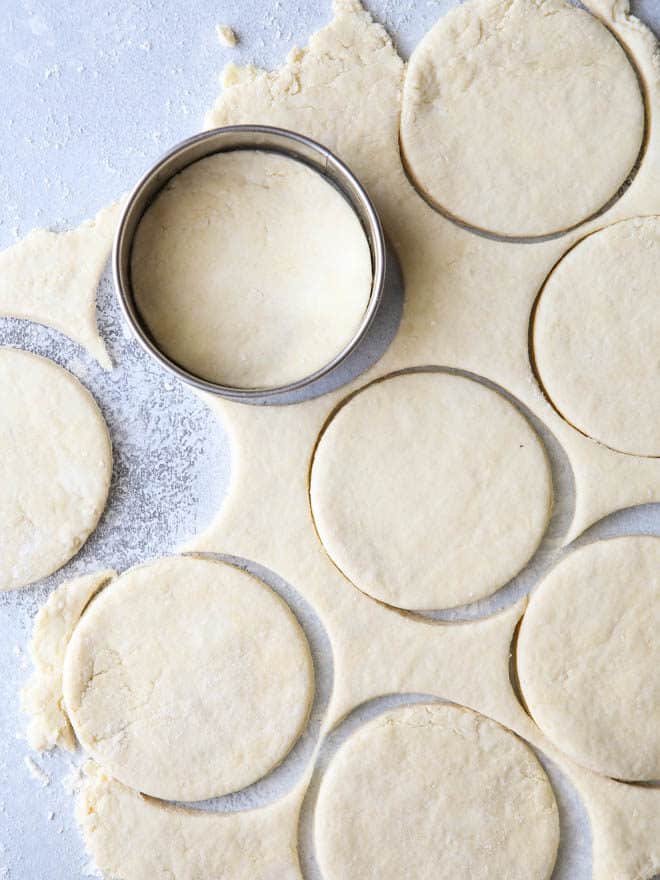
- Lightly flour your surface and roll biscuits out to 1/2 inch thick.
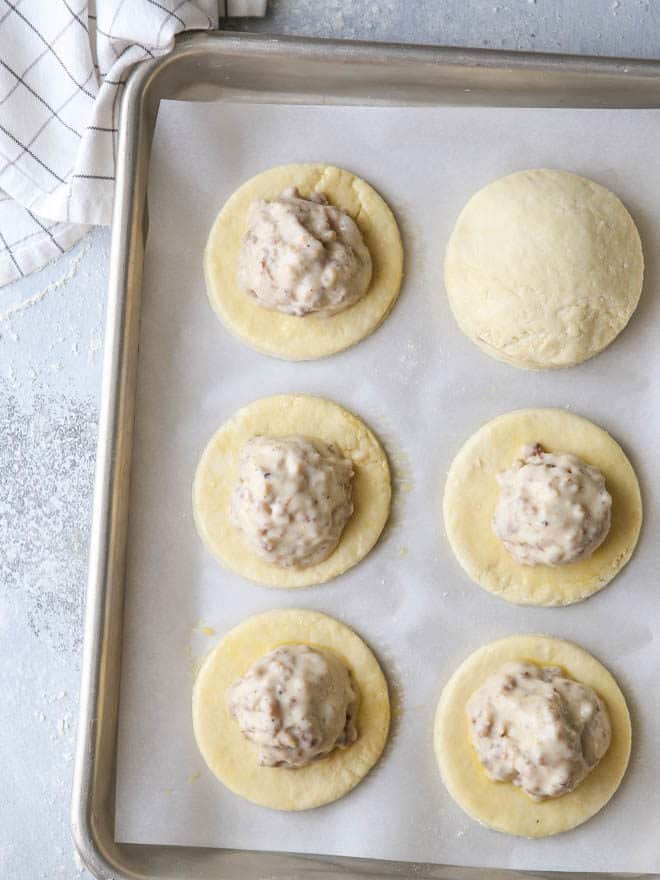
- Use a 3-inch round cutter to make 12 rounds. Place half of the biscuit rounds on the prepared pan and brush with egg wash.
- With a spoon or small cookie scoop, scoop cold gravy onto the center of the biscuits on the pan. Gravy should hold its shape. If it's still too loose, freeze for a few more minutes.
- Use your fingers to gently stretch the remaining biscuit rounds a bit. Brush with egg wash and place on top of the scooped gravy, egg wash-side down. Press biscuit rounds together, sealing the gravy inside.
- Brush tops with more egg wash and bake until golden brown, 22-25 minutes. Serve immediately or cool and store well-wrapped in the fridge for up to 3 days and in the freezer for 1 month.
Notes
- You may have leftover gravy. Spoon it over baked biscuits before serving, if desired.
- To reheat from frozen, heat in the microwave on high for 2 minutes.
Tools for this recipe
(Affiliate links below)
Disclosure: This recipe was created in partnership with Challenge Dairy, Inc. as part of a long-term ambassadorship. Thank you for supporting partnerships with brands I love and believe in, which make Completely Delicious possible. All opinions are always 100% my own. To learn more about Challenge Dairy, you can visit their website here. You can also find them on facebook, instagram, youtube, and pinterest.

Such a clever idea! Thanks for all of the extra details!
I made these today and to my surprise easier then I thought they would be. I did grate the butter to make it easier to incorporate with the flour mixture. I’ve never made homemade sausage gravy before and again was surprised at how easy it was. Since I didn’t have a rolling pin I improvised and used a bottle. I’ll definitely make these gain. Now I have my breakfast for the week for myself and a friend. Thanks! PS I also didn’t have a 3 inch cookie cutter so I used the rim from a mason jar. You can also use an empty vegetable can by removing the top and bottom lids in a pinch.
I have a quick and simple recipe for you today. No fuss, no frills, just some really tasty cookies.