

Homemade Cinnamon Ornaments
These easy 2-ingredient homemade cinnamon ornaments are a fun holiday project ,especially with kids. Use them year after year on your Christmas tree or gift them to others. As an added bonus, they will make your house smell amazing!

Decorating a real tree is one of my family’s favorite holiday traditions! And I love all of our kitschy sentimental and homemade tree decorations. I first made a batch of homemade cinnamon ornaments over 10 years ago, and we still hang them on our tree year after year.
They’re made with just 2 basic ingredients— cinnamon and applesauce (though I also like to add cloves for more holiday aroma). You roll the “dough” out, cut into shapes, and then dry in a warm oven or at room temperature. Add a string or ribbon, and that’s it!
“I make these as a kid over 40 years ago and they still have their smell and in one piece!!! I love putting them up every year. Store stacked together, wrapped in paper towel and in a small box… making them for a Christmas craft fair this year! Wish me luck!⭐⭐⭐⭐⭐” —from Tiana
Table of Contents
- Ingredients & supplies you'll need
- How to make homemade cinnamon ornaments
- Storage instructions
- Get the tutorial
Note: Even though these ingredients are all edible, these are not edible ornaments! They harden similar to clay and are not meant to be eaten. This is the only “recipe” on my website that you cannot eat, and I know it’s a little unusual for me to be sharing an inedible craft. But I hope you enjoy this tutorial! Me and my family sure did.

Ingredients & supplies you’ll need
These handmade ornaments require just 2 ingredients, with an optional 3rd:
- Applesauce— I use unsweetened, just the cheapest brand at my grocery store.
- Ground cinnamon— You’ll need a cup or more, so look for a larger bulk container.
- Ground cloves— Optional, but I love the extra boost of holiday aroma.
You’ll also need: rolling pin, cookie cutters, baking sheet pans, parchment paper, toothpick or skewer, and decorative string or ribbon.
How to make homemade cinnamon ornaments
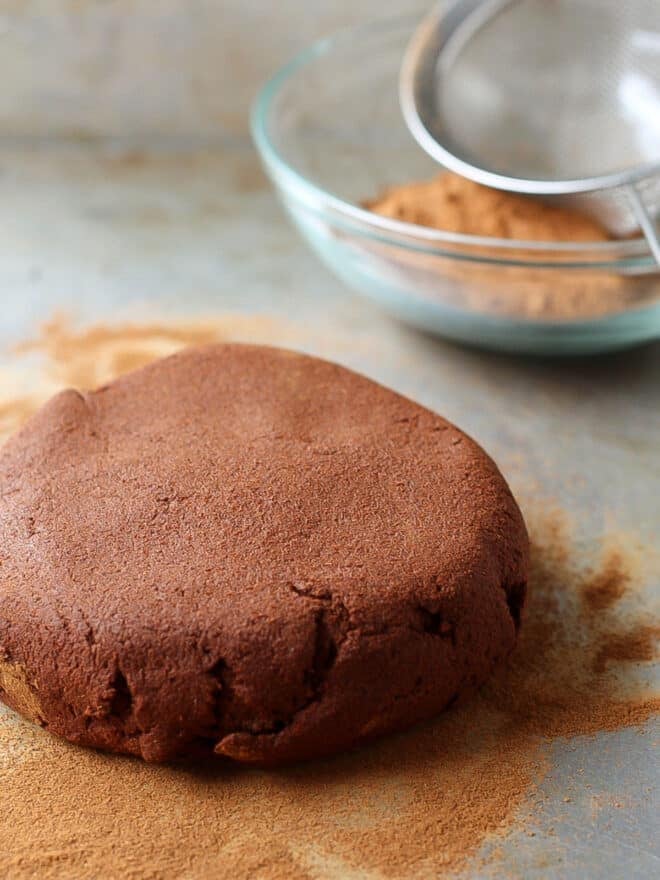
- Make the cinnamon dough. Combine applesauce and cinnamon. You’re looking for a slightly sticky dough that holds its shape, so add more cinnamon or applesauce if needed until you have the right texture. The amount of cinnamon you’ll need will depend a little on the applesauce you use, as some are softer than others.
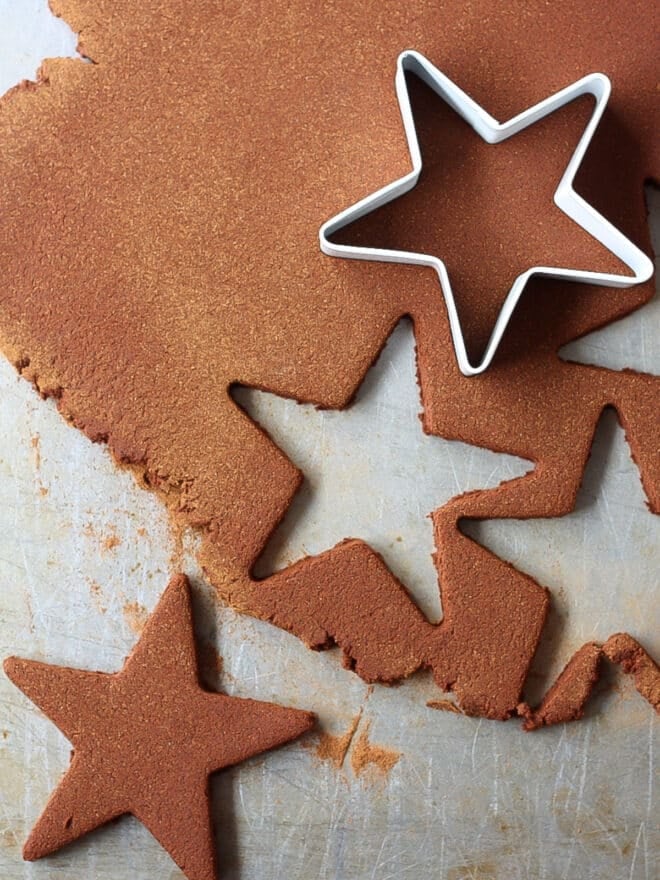
- Roll out & cut into shapes. Dust your counter with cinnamon, place the dough over it, and sprinkle it with cinnamon too. Use a rolling pin to roll out the dough to about 1/4-inch thick. Cut into whatever shapes you like, using cookie cutters or a sharp knife. Don’t forget to make a hole for the ribbon or string to hang it from!
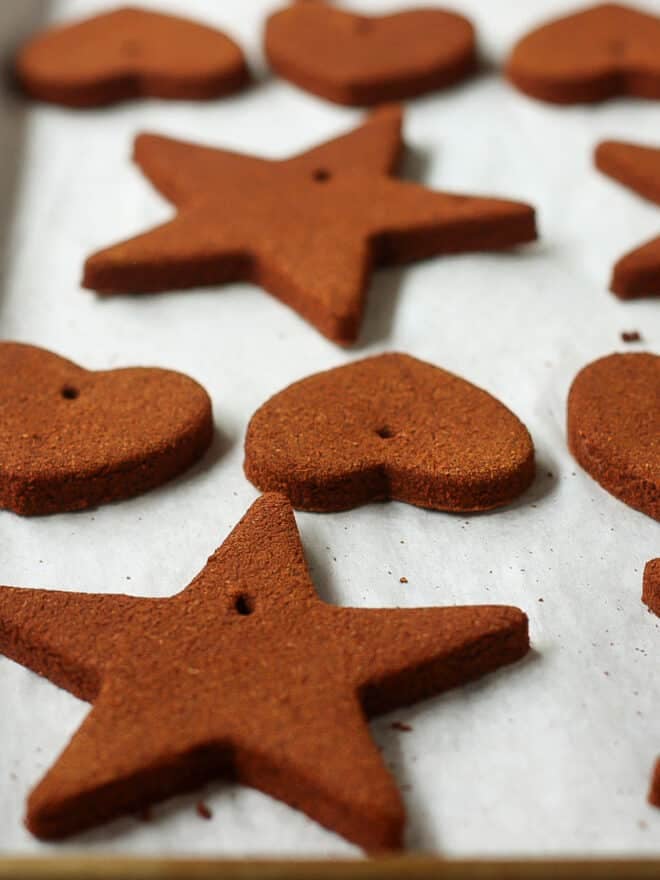
- Bake or let dry at room temperature. These ornaments can either be baked in a warm 200°F oven for a few hours, or you can leave them out on your counter top to dry over several days.
- Tie a ribbon or string for hanging. Once the ornaments are dried and hardened, use whatever ribbon or string you like and tie it through the hole you made.
- Hang on your tree! Or gift these to others. They’d also be great tied onto holiday gifts as part of a gift tag.
Storage instructions
These homemade cinnamon ornaments will last for years if stored properly with care. They can break if you’re not careful! I keep mine in an ornament box padded with tissue paper.
The ornaments lose a little of their aromatic potency over time, but look the same year after year!
Get the tutorial

Homemade Cinnamon Ornaments
Ingredients
- 1 cup applesauce
- 1-1 ¼ cup 130 grams ground cinnamon
- 1 tablespoon ground cloves optional
Instructions
- Preheat oven to 200°F. Line a sheet pan with parchment paper.
- In the bowl of a stand mixer fitted with a paddle attachment, combine the applesauce, 1 cup cinnamon, and cloves (if using). You want the dough to be able to form a ball without being too sticky. Add additional applesauce or cinnamon if needed. You can also mix the dough by hand.
- Sprinkle a clean surface with cinnamon (like you would with flour while rolling out cookies). Place the dough on the surface and sprinkle with more cinnamon. Use a rolling pin to roll the dough to ¼ inch thick, sprinkling with more cinnamon to keep from sticking.
- Cut out into desired shapes and place on the prepared sheet pan so that they aren't touching. Use a skewer to poke a hole into each ornament (to attach string). Bake in the preheated oven for 1 ½ – 2 hours or until rock hard.
- Loop a decorative string through the ornament and hang on your tree.


Just asking out of curiosity if a few drops of essential oils would refresh older ornaments without risking integrity…
I haven’t tried it, but it sounds like a nice idea!
Just wanted to say these came out wonderful! Was so worried they would crack in the oven, but they were fine! Even the delicate snowflake cutouts! Followed the measurements and used a lot of extra cinnamon for handling the sticky dough, periodically checked them every 15-30 mins while cooking. Mine took about 1 hr and 45 mins in total to harden up. Then used a white paint pen and some glitter paint for decoration, so beautiful!!
So happy they worked out for you! And I love the decoration idea!
I’m wondering if a drop or two of essential oils would refresh older ornaments without risking integrity…
Helena
I’m so happy to find this recipe — thank you! The one I used (minus the cloves, but will be a nice add) was from Sunset Magazine way back in the 1970’s. My old ones (don’t know what happened to them; too many moves) lasted for years. I stored them in a dress box between layers of tissue paper. Eventually the cinnamon scent fades, but I’d imagine they could be revived with essence oil.
something in this recipe seems to be missing. There was no way it could be rolled out and cut with a cookie cutter for me. It was very soupy. I tried adding flour…. nope. Oh well
How many ornaments does this recipe make?
Hi Jill! It depends on the size of your cookie cutters – about 3 dozen.
I’m wondering if a drop or two of essential oils would refresh older ornaments without risking integrity…
Love this project – I come back to it often!
I just made these last night, I they look great but I don’t think they smell as strong as everyone in other posts have said. I followed the recipe and even added cloves. What did I do wrong????
Hmmm, maybe the cinnamon isn’t fresh?
I could get the dough to hold together at all, I ended up throwing it away I was frustrated! Any tips? I had mitts unsweetened apple sauce and regular cinnamon. Does the applesauce need to be cold?
Could NOT get the dough to hold together
If the dough doesn’t hold together, just add more cinnamon until it does. Every batch I’ve made is a bit different. Sometimes I have to add applesauce and sometimes I need more cinnamon to get the right texture. Sorry to hear it didn’t turn out for you!
I made these for years while teaching Parent Toddler classes at our local Nursery School, they were always a big hit. One thing I discovered quite by accident was the year I purchased bulk size cinnamon (16oz?) from one of the big box membership stores. Each year we made these in the classroom with the children stirring the applesauce and cinnamon mixture until it resembled a ball of soft pie dough. The children then rolled it on cinnamon covered surfaces with small plastic rollers and pressed their chosen ornament shapes into about a quarter inch thick piece of dough. A spatula was used by teacher or Mom to place the shapes on paper plates where a straw was used to poke a hole for red or green very thin craft store ribbon. Mom and child took their ornaments home and proceeded to turn them each day until they were no longer dark in the middle, whch kept them flat and also indicated they were completely dry and ready to use.
The discovery? Well, using the same store brand unsweetened applesauce each year, the year of the bulk cinnamon the mix would not hold together. I would make a ball in my hands, release it onto the table top and it immediately collapsed into small pieces and “dust”. Yes, I added more applesauce, but it just did not “mix” with the cinnamon! Adding more cinnamon gave the same results. Finally I used the grocery store standby and had no problem. I returned the remaining cinnamon to the place where it had been purchased, so I cannot give you a brand name, but I will verify that those of you who have had this experience have not lost your minds!
A friend shared this on Facebook and we tried it last night. They came out great. I think we will make more for Christmas gifts this year! THANK YOU for sharing such a fun project for us to do together.
Yay! So happy to hear you like these!
I used this exact recipe and it didn’t form at all, it was like runny brownie mix so i added s little cornstarch and some flour and they turned out PERFECT! Looking for a better recipe for next time I decide to make these, but I’m excited my house will smell amazing for the holidays ?
We also hang on the neck of our guest closet hangers.
What a great idea!
You can also let fry naturally. Turn occasionally till completely dry. I’ve had mine 20 years. They still smell good.
I have made these, but always with glue..i wonder what the difference is?
Thank you for sharing your recipe. I have never seen these in the U.K before and decided to have a go at making them. They looked fantastic on our tree and the Christmas smell they created was very nostalgic. I made my own apple sauce using old apples puréed with a little water as I could not find any applesauce. I will definitely be making some more next year. Thank you!