Chocolate Peppermint Bars
These layered dark chocolate peppermint cookie bars are easy to make and so delicious!
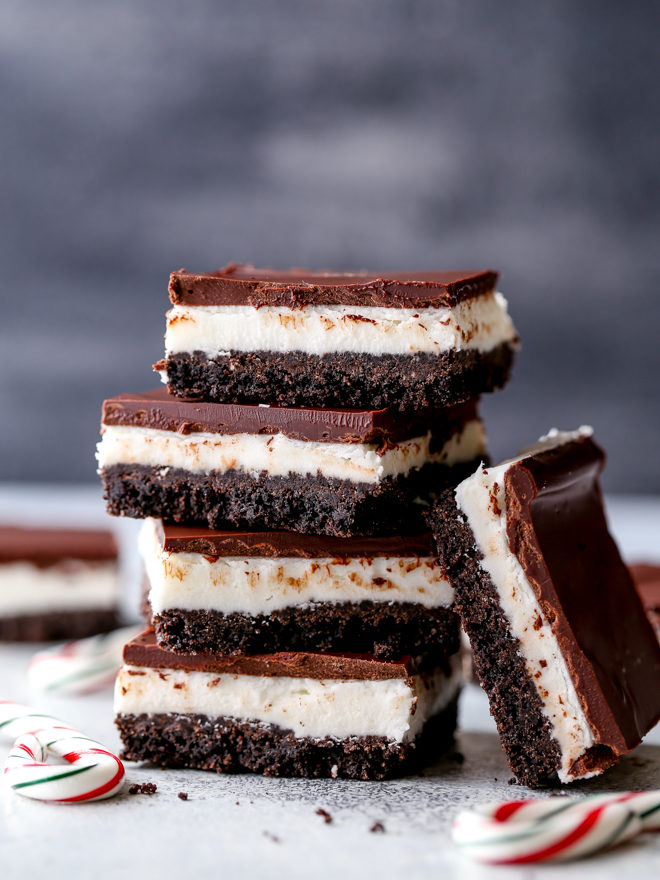
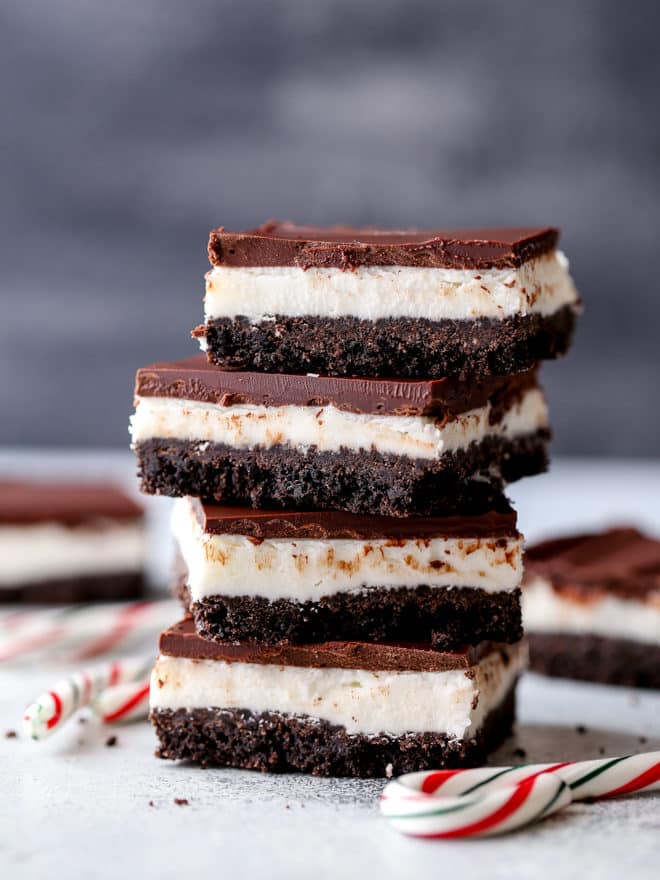
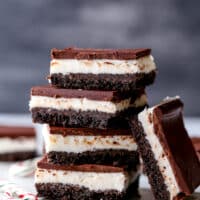
I’ve had my eye on these chocolate peppermint bars since I first saw them in a Better Homes and Garden magazine. They’re so simple, and I love the look of all those layers. There’s a crust of chocolate cookie crumbs, followed by a creamy peppermint filling, and a topping of dark chocolate. It’s like a homemade peppermint patty with a satisfying cookie crunch. What’s not to love?
These chocolate peppermint bars are perfect for the holidays, or any time of the year really. They keep really well so you can make them up to a week ahead, or store them in the freezer and they’ll keep even longer.
baking tip:How parchment paper can make baking easier
For cookies, biscuits and scones: Line sheet pans with parchment paper before using. Prevent sticking without adding any extra grease and cleanup is as easy as throwing away the parchment!
For cakes: Line the bottoms of your cake pans with parchment paper and then either grease and flour, or coat with baking spray. You’ll never have a cake stick in your pan again!
For bars and breads: Line square or rectangular pans with parchment so that there’s a few inches of overhang on either side. When your baked good is ready to serve, use that overhang as a handle to lift it out of the pan. Then transfer to a cutting board and slice. No more messing up a slice trying to dig it out of the pan!
Shop tools for this recipe
Chocolate Peppermint Bars
Ingredients
Cookie crust:
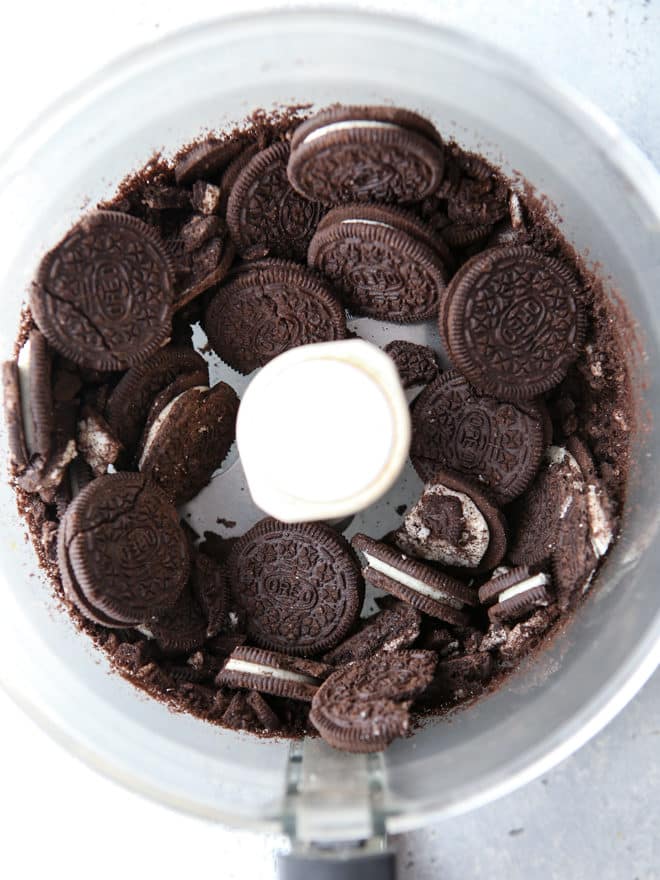
- 14 oz package chocolate sandwich cookies with cream filling (400 grams)
- 6 tablespoons butter (85 grams), melted
Peppermint cream:
- 1/2 cup butter (1 stick, 113 grams), softened to room temperature
- 4 cups powdered sugar (455 grams )
- 1 teaspoon peppermint extract
- 1/4 cup milk (60 ml)
Chocolate topping:
- 12 ounces quality semi or bittersweet chocolate (340 grams), chopped
- 2 tablespoons butter
Instructions
- Preheat oven to 350°F. Line a 9x13 inch pan with parchment paper or greased foil.
- In a food processor, pulse the cookies (do not remove filling) until they're fine crumbs. You can also place cookies in a ziplock bag and use a rolling pin to crush cookies. Add melted butter and stir until combined.
- Press cookie crumb mixture into the prepared pan. Bake for 10-12 minutes. Let cool completely.
- With an electric mixer, beat softened butter, powdered sugar, peppermint extract, and milk until smooth and creamy, about 2-3 minutes.
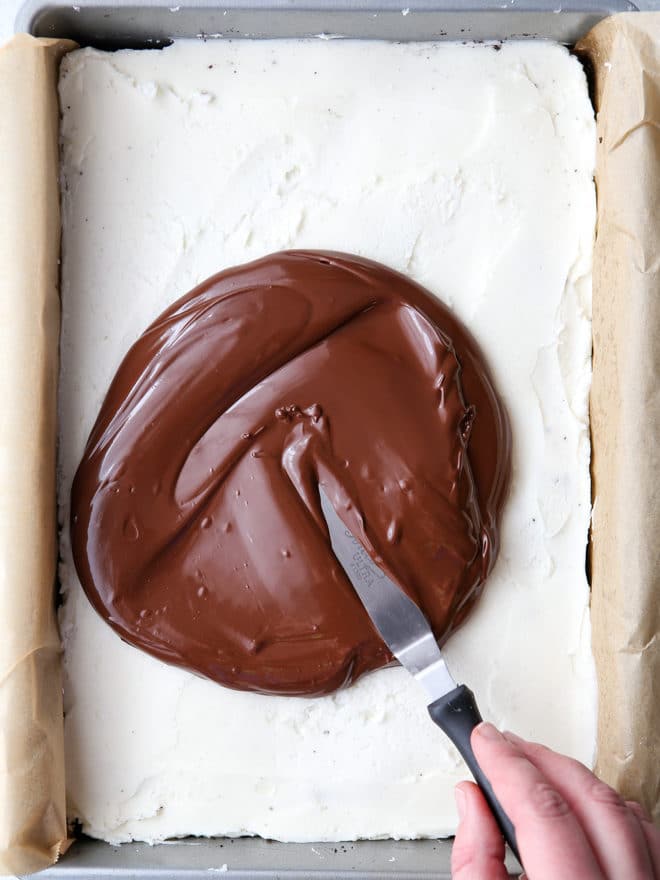
- Spread on top of cooled cookie crust. Freeze for 15 minutes.
- In a heatproof bowl set over a pot of simmering water, melt chocolate and butter just until no lumps remain, about 5 minutes. Stir until smooth.
- Spread chocolate over peppermint layer.
- Freeze for 15 minutes or chill in the fridge for 30 minutes before slicing.
- For clean slices, dip a sharp knife into hot water and wipe dry in between each slice.

I made these bars for my family yesterday, and everyone’s one complaint is that the Oreo crust layer was too crunchy. I think 12 minutes was far too long. It was unpleasantly crunchy. Other than that, these bars are really yummy. I think it’s just the right amount of peppermint extract. I was worried it would be over-powering, because as I was whipping the buttercream, it just smelled so potent, but it was perfect. I did use salted butter for the buttercream and I even added 1/4 tsp of salt to cut down on the sweetness of that 2nd layer. I also whipped the buttercream at high speed for longer than the recipe indicated to get it creamy and light. These are easy and yummy, and I’ll make them again with some minor adjustments.
Try processing the cookies longer to a finer crumb.
I was so excited about these but they came out terrible. I’m not sure what went wrong. The crust was so crumbly that it peeled off and away from the edges when I tried to frost them. Even using the recommended pan size, there wasn’t enough of the buttercream. I didn’t even bother finishing them.
I just made these today and they turned out great!! Exactly how I had hoped. The peppermint filling is so tasty, I could just eat that by the spoonful alone. I checked the crust layer at 10 minutes and it was good to go, probably could have even done with 1-2 minutes less but it’s not too crunchy. Overall, I am really happy with how they turned out