Angel Food Cake
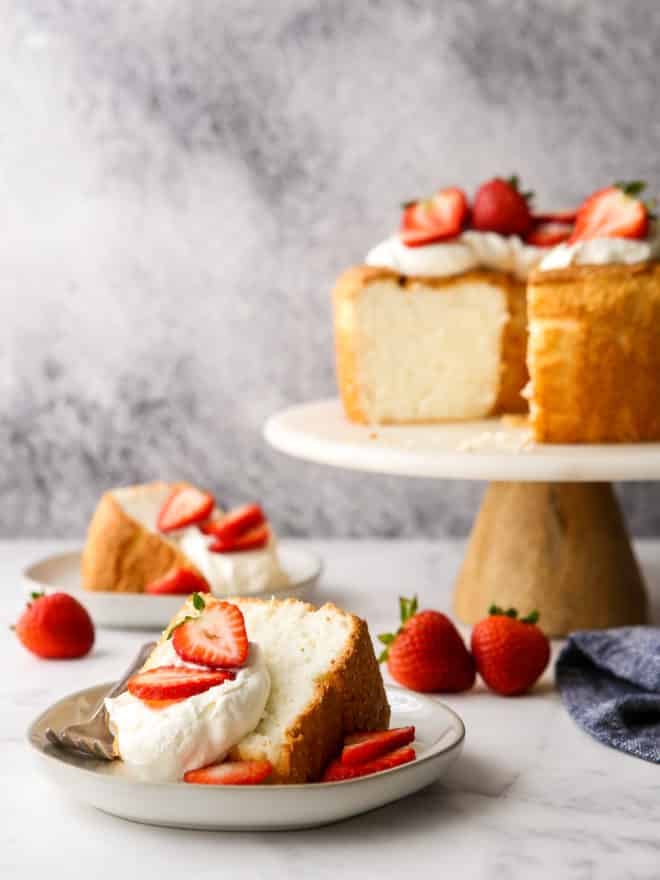
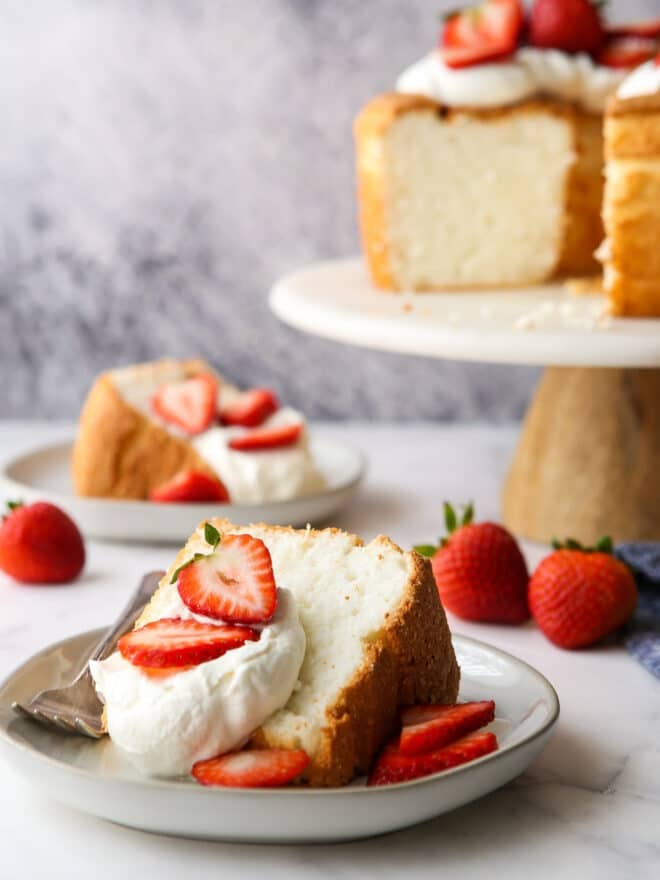
Angel food cake is a classic cake made from whipped egg whites. It’s subtly sweet, very light, and delicate. Top it with whipped cream and berries for the perfect light dessert!
For a long time angel food cake had been filed away in my brain under “too intimidating”. I never even thought about attempting it (which is so silly!).
When I finally baked my first angel food cake I was shocked at how simple it was. Yes, you do need a special tube pan, but the rest of it is very doable for any level of baker.
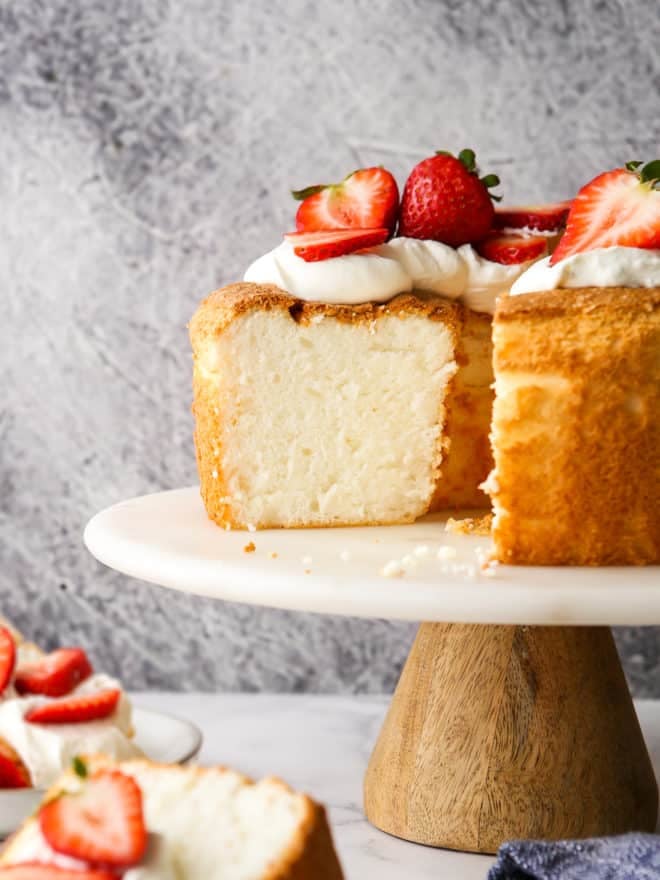
Angel food cake is known for it’s delicate flavor, and soft and spongy texture. It’s a wonderfully light dessert, and perfect for all occasions. I love to serve it with whipped cream and strawberries, but you can serve it however you like!
See also: Angel Food Cake Cupcakes and Coconut Angel Food Cake.
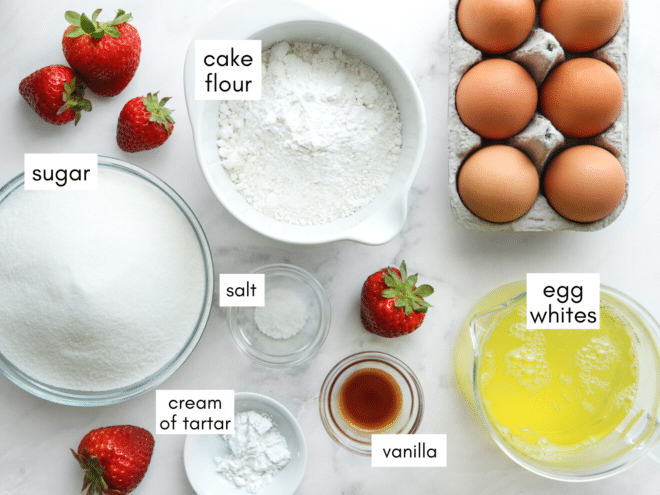
Ingredients you’ll need
Here’s everything you’ll need to make this classic angel food cake (find the full recipe at the end of this post):
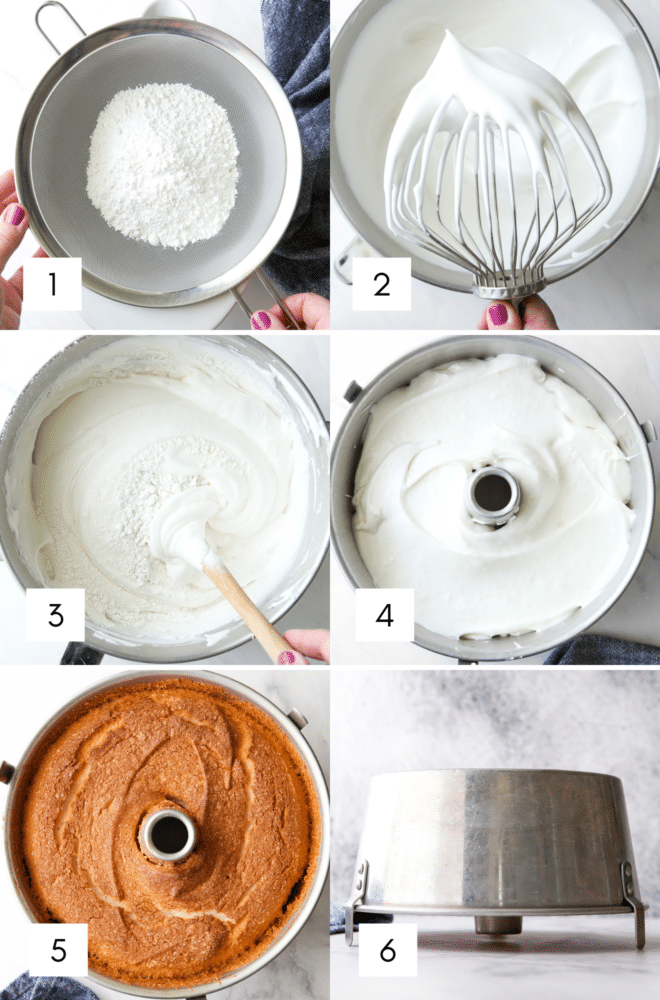
How to make angel food cake
It really isn’t that hard to make, but it is unique, and it’s made differently than most cakes. As always, follow the recipe instructions as written for the best results.
Now, let’s get baking!
- Sift cake flour and sugar. Sift the cake flour first 3 times, then sift the flour with ⅔ cup sugar.
- Whip egg whites. Beat eggs till frothy, then add salt and cream of tarter and beat until they just begin to form soft peaks. Add remaining sugar while continuing to beat egg whites until they hold soft peaks. Mix in the vanilla.
- Fold together. Sift the flour mixture over the beaten egg whites in 4 separate additions, gently folding in each addition by hand until incorporated.
- Spread into tube pan. Spoon batter into ungreased 10×4-inch tube pan and bang on the counter a few times to release any air bubbles.
- Bake. Bake in preheated 300°F oven for about 1 ¼ hours, until spongy to the touch and toothpick comes out clean.
- Cool upside-down. Immediately invert cake onto the feet of the pan (or over the neck of a bottle) and cool completely, about 2 hours. Cooling it upside-down ensures it doesn’t collapse during cooling.
Then, enjoy!
What to serve with angel food cake
You can serve it however you like! And honestly, it’s delicious all by itself. Here are a few toppings suggestions:
- Whipped cream
- Chocolate ganache
- Berries or sliced fruit
- Ice cream
- Lemon curd
Angel food cake FAQs
Cake flour has less protein than all-purpose flour, and so it creates less gluten, keeping the cake very light and delicate. Using all-purpose flour will change the texture of the cake, leaving it more dense and tough. Use cake flour for best results.
Egg whites whipped to “soft peaks” means that they are just starting to hold their shape, but are still soft and fold back onto themselves.
An tube pan is designed specifically with a hole in the center and tall, straight sides so that the egg whites in the batter cook evenly and are allowed to rise high as they bake. Using a regular cake pan won’t work because the edges will be overcooked before the center is done.
Look for tube pans in a well-stocked bakeware aisle, or you can shop online.
Angel food cake has much less flour than a regular cake; its rise is created by the whipped egg whites and until it cools, its structure is not set. Allowing it to cool upside down ensures it doesn’t collapse.
Many tube pans come with feet around the edges for this very purpose. However, inverting the center ring onto the neck of a bottle will also work.
You’ll have about 1 dozen egg yolks leftover, which is a lot to waste! If you don’t already have a use in mind, I highly recommend my lemon curd recipe (which uses 10 yolks). It’s also a delicious topping for the angel food cake!
More tips for this recipe
- Cold egg whites won’t whip as well. Pull yours from the fridge 30-60 minutes before making this recipe.
- Learn how to separate eggs here.
- Be sure no trace of egg yolk ends up in the whites, or else the fat will prevent the whites from whipping up properly.
- Here’s a great visual on how to fold ingredients into each other.
- If you can’t find a tube pan for this recipe, check out this hack for creating tube cake pan at home.
- Be sure you do not grease the pan! This is opposite of almost every other cake recipe, but this cake relies on the batter being able to stick and hold onto the sides for rise.
- To release the cake from pan, slide a small serrated knife around all of the edges.
- A serrated knife is best for cutting slices, too.
- Angel food cake keeps really well at room temperature for several days. It can be frozen too, wrapped twice in plastic cling wrap. Thaw at room temperature for several hours.
Shop tools for this recipe
This recipe was originally published June 2014. While the recipe remains the same, photos and tips have been updated.
Angel Food Cake
Ingredients
- 1 cup (113 grams) cake flour
- 1 ⅔ cup (333 grams) granulated sugar
- 1 ¾ cup (425 grams) egg whites (from about 13 eggs)
- ½ teaspoon salt
- 1 teaspoon cream of tartar
- ½ teaspoon vanilla
- Strawberries and whipped cream for serving , optional
Equipment
Instructions
- Preheat oven to 300°F.
- Sift the flour 3 times, then add ⅔ cup of the sugar and sift 1 more time.
- Beat the eggs until frothy. Add the salt and cream of tartar and beat till they just begin to form soft peaks. Add the remaining sugar gradually white continuing to beat egg whites until they hold soft peaks. Mix in the vanilla.
- Sift the flour mixture over the whipped egg whites in 4 additions, folding in each addition by hand until just incorporated.
- Spoon into an ungreased 10 x 4 inch tube pan. Rap on a hard surface a few times to release any bubbles. Bake until spongy to the touch and a toothpick inserted into the center comes out clean, about 1 ¼ hours.
- If the pan has feet, invert it onto a flat surface. Otherwise, invert over the neck of a bottle. (This keeps the cake from collapsing as it cools) Let cool 2 hours. Use a thin serrated knife to cut around the edges and release the cake.
- Slice and serve with whipped cream and strawberries, or as desired.

This is probably the most appealing and good looking Angel Food Cake I’ve ever seen…and it was just your very first attempt at making it, congratulations! Also, thank you so much for the recipe, I’m more than sure that it’ll become a staple in our home!
xo, Elisa
I’ve been wanting to make my own cake like this forever!! This recipe is absolutely stunning!
Absolutely, mouthwateringly gorgeous! Truly, I loved reading this post and looking at your lovely photos, Annalise… they have so much soul to them! This cake is perfection. Light as air and simply delicious served with fresh strawberries. Thanks for sharing.
Your angel food cake looks absolutely perfect. Angel food cake definitely reminds me of the South and my childhood, as my mom would make these every summer!
I am so jealous you have made such a lovely angel cake. I have never made one successfully but Asian countries love the chiffon cake which is similar in texture. I love, love to serve this with berries and simple honey cream.
So fluffly, light and delicious….. Our fav shot from this post s the one you are removing the yolk!
I’ve never made an angel food cake before, but I hope to try this soon! Looks really fluffy and light 🙂
This looks amazing! I’m so glad you gave it a whirl 🙂 Gorgeous pics!
I think I can do it because of the recipe you are sharing. That looks so yummy!Thanks for sharing.
Looks delicious! =)
I’ve always been intimidated by angel food cake too! But now I really need to get over my fear and make this stat! It looks so incredibly light and fluffy!
Yes! You’ll have to give one a try and let me know what you think!! 🙂
Beautfiul cake! I love how angel food cake is so delicate, light and spongy.
Oh wow… These are such lovely photos and this cake looks perfect for a hot day when you just need a light and airy treat. Great post.
kristaandmichele.com
What a beautiful cake, light and tasty, I really love it, thank you:)
Tastes delicious with strawberries macerated in Grand Marnier and fresh whipped cream. Yum!
Great recipe! Thanks!
I had to buy an angel food cake for a recipe a couple of weeks before I found myself making this homemade version. Oh. My. Gosh. The store bought version tasted like.. lint from an old sweater?? What even was IN it??? It was horrid. I was pleasantly surprised (albeit a bit intimidated) that the homemade version was not only a million times more delicious but actually not all that difficult (thanks to your super helpful tips & notes & step by step photos)! I’ve added this to my list of fav recipes and will be making it again in another few weeks for a party I’m hosting! THANK YOU!!
Thank you Yvonne! So glad you enjoyed this recipe! xo