How to Bake Picture Perfect Cookies
Take your next batch of homemade cookies from good to great! Here are all of my best tips and tricks for baking a perfect cookie, one that not only tastes delicious, but looks amazing too.

You’ve likely heard the phrase “we eat with our eyes first”, and it’s true. Your homemade cookie might taste great, with the best buttery flavor and chewy texture, but does it look good too?
Whenever I share a plate of cookies with friends, I’m often asked how I make them look so perfect. And thankfully, it’s quick and easy for anyone to do! Just a few tricks can make all the difference.
Keep reading to see how I make the best, no-fail, most picture-perfect homemade cookies ever.
Table of Contents
- How to bake picture perfect cookies
- Step 1: Pick a good recipe and follow it
- Step 2: Start with butter at the right temperature
- Step 3. Measure flour correctly
- Step 4: Portion and shape cookie dough
- Step 5: Garnish with mix-ins on top
- Step 6: Reshape into rounds while cookies are hot
- Other things to consider
- My favorite cookie recipes
How to bake picture perfect cookies
You’re just 6 steps away from your best batch of cookies yet!
- Pick a good recipe and follow it as written.
- Start with butter at the right temperature.
- Measure flour correctly.
- Portion with a cookie scoop and shape into balls.
- Garnish with mix-ins on top of the dough before baking.
- Re-shape into rounds when they come out of the oven.
Step 1: Pick a good recipe and follow it
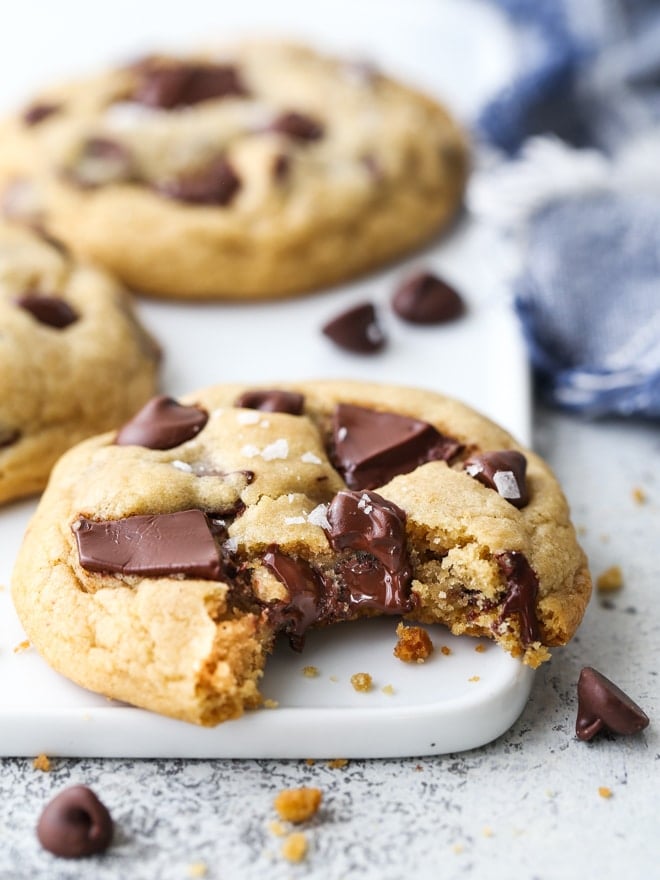
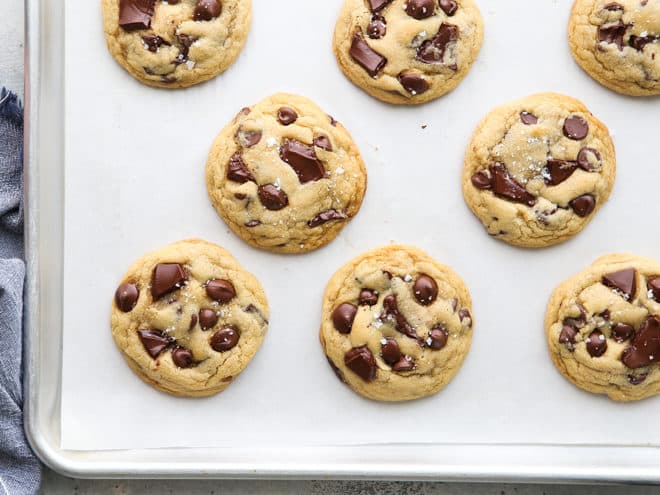
It all starts with a stellar recipe. If you have one you know and love, use it! If you’re still searching, I highly recommend the Classic Chocolate Chip Cookies pictured in this article.
For best results— and fewer surprises— stick to the recipe as written. Most of my cookie blunders happen when I try to play around with ingredients and ratios. Experimenting with a cookie recipe isn’t necessarily a bad thing (some of my favorite cookie experiments came about that way!), but just know they might not look their best on a first try.
If you’re in charge of cookies for a potluck, or are hoping to impress others with your baking prowess, it’s probably best to save the experimenting for another day.
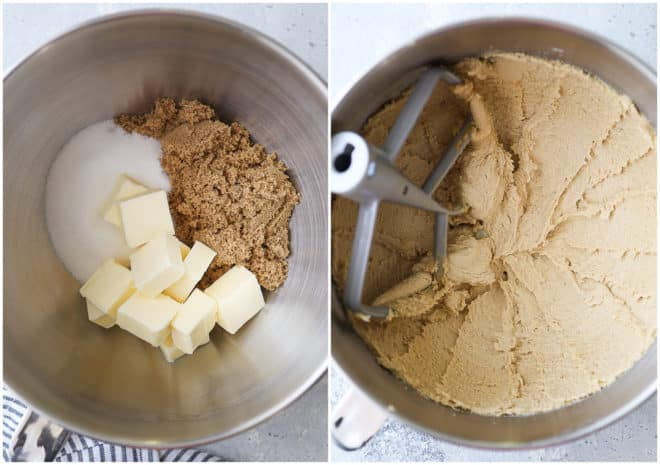
Step 2: Start with butter at the right temperature
The softness of your butter when you start mixing will make or break your cookies, and room temperature butter is actually much colder than you think it is. If it’s soft or at all shiny or greasy looking, the dough will be too soft, the butter will melt too soon, and you could end up with cookies that spread too much during baking.
Butter should be soft enough that it will leave a slight indent when gently pressed, but not so soft that your finger is able to press all the way through the butter.
For best results, let the butter sit on my kitchen counter 30-60 minutes (depending on how warm your kitchen is) before using. If you’re short on time, here are 4 Ways to Quickly Bring Butter to Room Temperature.
Step 3. Measure flour correctly
When a friend or reader asks for help troubleshooting a cookie recipe I always ask 2 things– how soft was the butter, and how do they measure flour. Too much flour can result in a dry, crumbly and/or cake-like cookie.
How you measure flour can make a huge difference on how much flour actually ends up in your dough. Flour compacts over time and if you just dip your measuring cup into the flour and level it off, you’re likely getting a tablespoon or 2 extra with each cup, which adds up in a recipe.
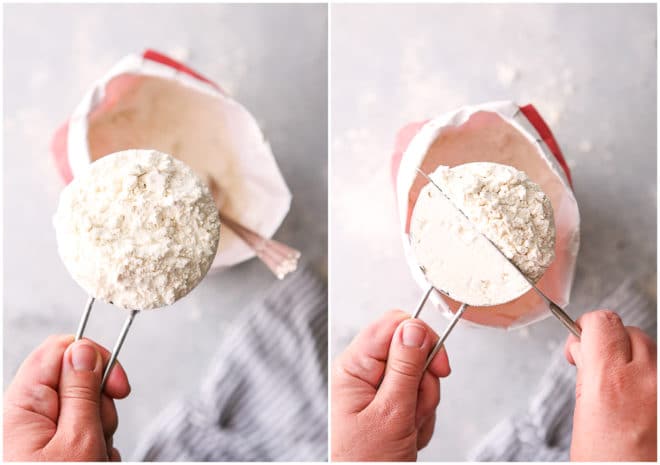
To measure flour correctly:
- Fluff flour in bag or container slightly so it’s not so compact.
- Use a spoon to scoopflour into your measuring cup, scooping flour into the cup until it’s overflowing.
- Use a knife or flat surface to scrape off the excess flour from the top.
Or better yet, use a kitchen scale! All of my baking recipes have gram measurement for this reason. For even more help and information, see my full post on How to Measure Flour Correctly.
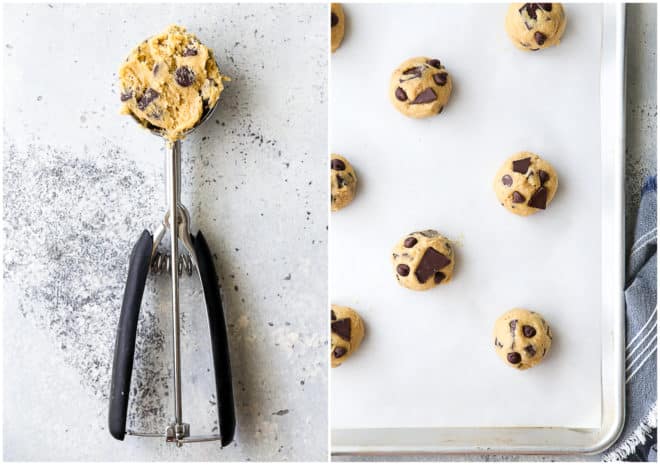
Step 4: Portion and shape cookie dough
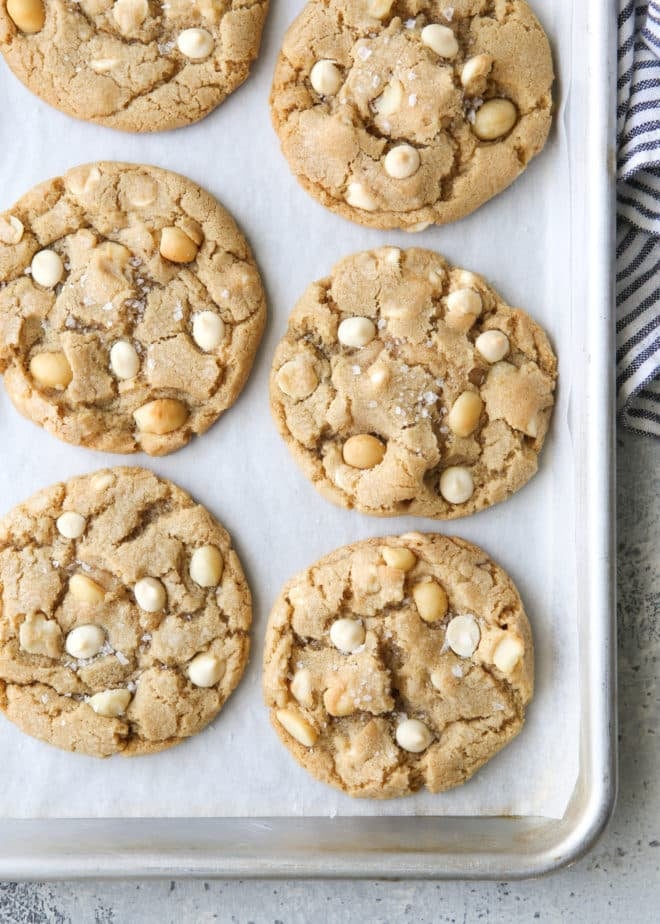
To ensure all of the cookies bake evenly, portion them to be the same size. I like to use a #20 3 Tbsp spring-loaded cookie scoop to make large pretty cookies. In my opinion, this is the perfect amount of dough to get crispy edges and a soft chewy texture inside the middle. If you want smaller cookies, you can use a #40 1.5 Tbsp cookie scoop.
Once cookie dough is portioned, roll each into a ball and place on a baking sheet pan lined with parchment paper.
Step 5: Garnish with mix-ins on top
Mix-ins like chocolate chips often get hidden within the cookie dough during mixing. What’s actually in your cookie? We want to know! So save some chocolate, nuts, dried fruit, etc. to add strategically on top of the cookie dough balls before baking.
Step 6: Reshape into rounds while cookies are hot
If your cookies baked up a little misshapen, don’t fret. Simply use a spatula or round cookie cutter to shape cookies back into a circle. You’ll need to do this during the first few moments after the cookies come out of the oven, as they start setting up pretty quickly. Act fast!
Other things to consider
If your cookies aren’t turning out how they should, or you want to take extra steps to making your cookies perfect, here are a few more important things to consider:
- Is your oven temperature really what it says it is? Often they’re not calibrated to be perfectly accurate. Use an oven thermometer (they’re cheap!) to know exactly the temperature of your oven so cookies bake up as they should.
- The type of sheet pan you use matters! Dark metal pans will result in darker cookies. These Nordic Ware aluminum pans are my favorite for baking.
- Line pans with parchment paper or silicone baking mats. Do not grease the cookie sheet, as this will encourage cookies to spread.
- Chill the cookie dough, if needed. Some recipes require chilling, so definitely follow those instructions if given. But you may also be able to save a too-soft cookie dough from spreading in the oven by chilling cookie dough balls on the sheet pan for 15-30 minutes before baking.
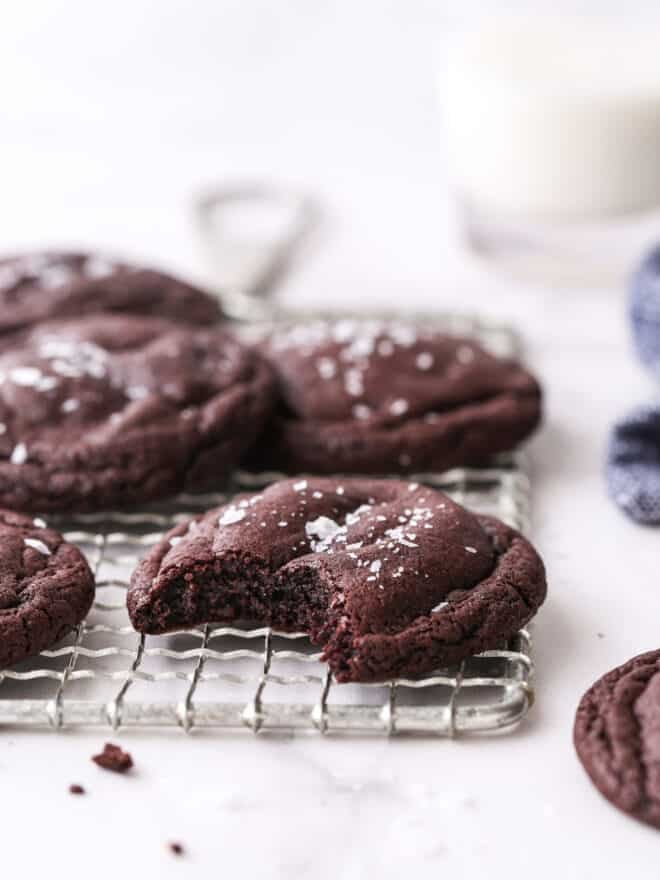
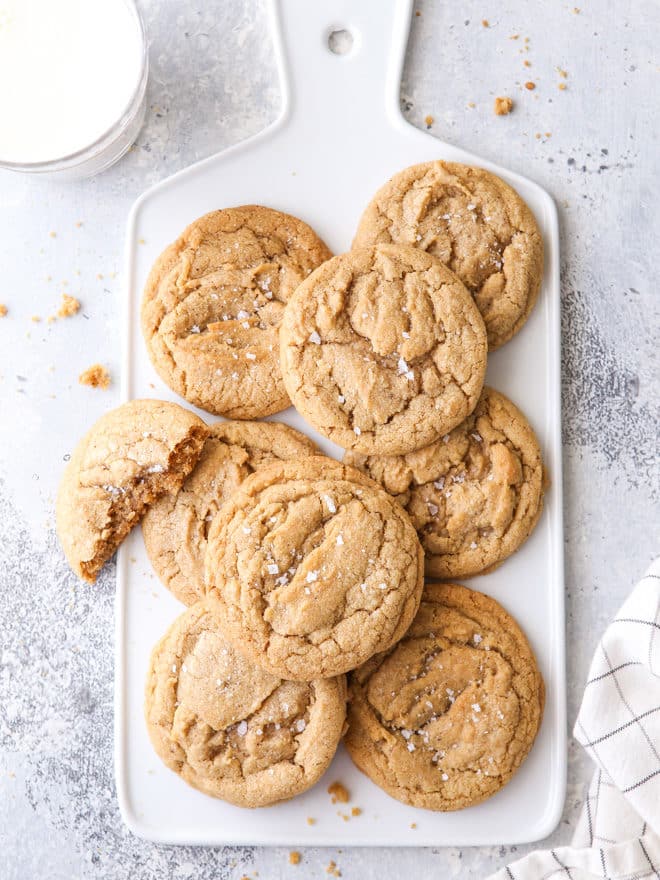
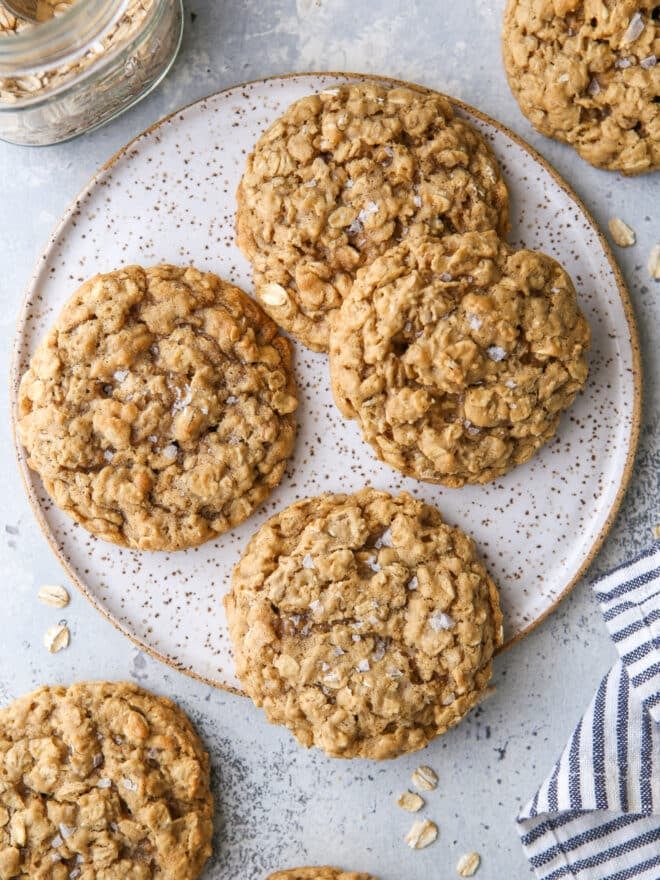
- Don’t underestimate the power of flaky salt! I almost always sprinkle baked cookies with a bit of flaky sea salt when they come out of the oven. Not only does this enhance the sweet and salty flavor of the cookies, but it adds visual texture and appeal. Simply put, it makes your cookies look fancy!
- Cookies look their best the day they’re baked and I always bake them fresh the day I plan to serve them. To prep dough ahead of time, store cookie dough balls in the fridge for up to a week or in the freezer for a month or more. Thaw and let cookie dough come to room temperature before baking. See my article How to Store Cookie Dough for more info.
My favorite cookie recipes


What great tips! as a professional baker, I agree 100% and it is lovely of you to share these tips with home bakers 🙂