

Homemade Strawberry Pop Tarts
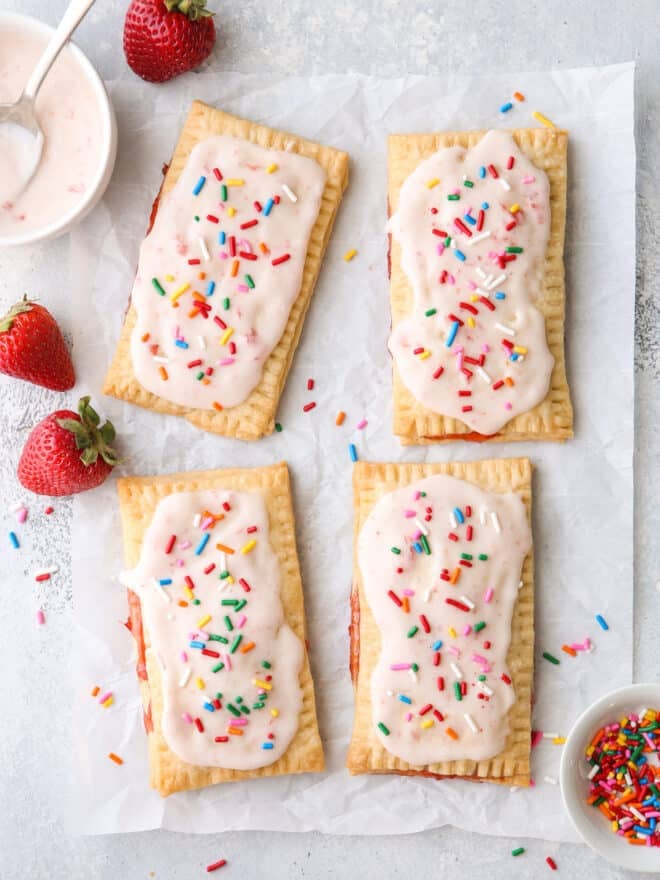
These homemade strawberry pop tarts made with strawberry preserves and flaky pastry are so much better than store-bought!
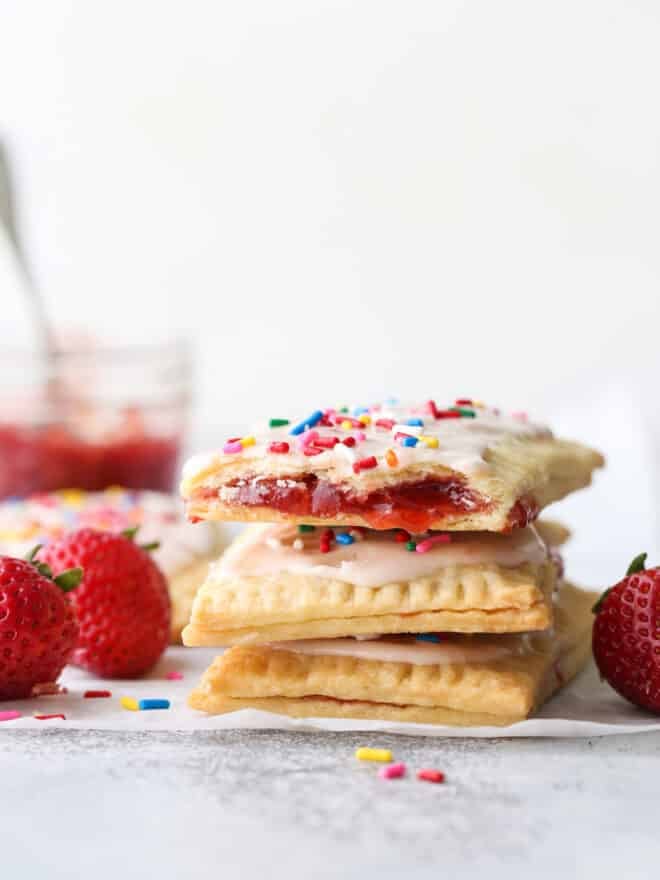
There’s something very exciting about turning pre-packaged and over-processed nostalgic foods into something homemade, more wholesome, and waaaayy more delicious. Like these homemade strawberry pop tarts!
Both kids and adults are guaranteed to love the combo of homemade flaky pastry, fresh strawberry preserves, and icing. Bake a batch today!
“Excellent recipe!! Used my own homemade jam. The crust was buttery and flaky!! Definitely will be making this again!!⭐⭐⭐⭐⭐” —from reader Jamie
What are “pop tarts”?
Pop tarts are essentially hand pies made by sandwiching two pieces of pastry crust together around a jammy fruit center. They’re a nostalgic quick breakfast treat, and you can find them in the breakfast aisle of almost any American grocery store in a variety of flavors. This homemade version is unsurprisingly more delicious, and a fun baking project for anyone and everyone!
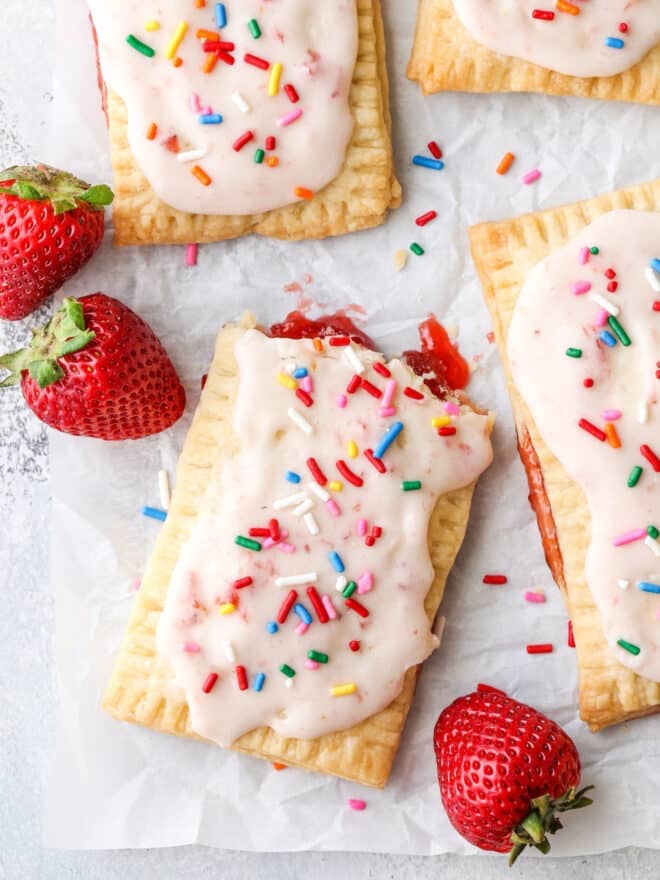
There are 3 parts to these homemade pop tarts
- Pie dough— The recipe below is very similar to my foolproof flaky pie crust recipe and every bit as delicious. Can you use store-bought pie dough? Absolutely!
- Strawberry preserves— Make your own (recipe included below) or use your favorite store-bought brand of preserves or strawberry jam.
- Frosting and sprinkles— Both are completely optional, but they complete the “pop tart” look!
Ingredients you’ll need
Here’s everything you need to make these pop tarts completely from-scratch (full recipe at the end of this article):
- Fresh or frozen strawberries
- Sugar, lemon juice and zest, and vanilla extract for flavoring the homemade preserves
- All-purpose flour, salt and sugar for pie crust
- Butter
- Powdered sugar
- Milk or heavy cream
- Sprinkles
How to make homemade pop parts
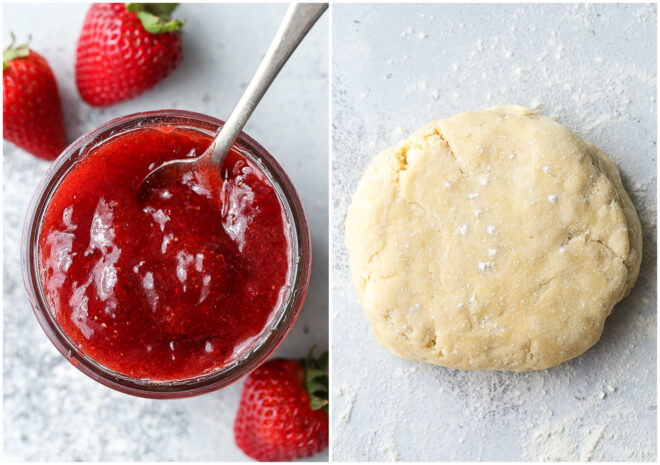
- Make the pie crust. Combine dry ingredients, cut butter in with pastry blender, then add water and combine to make a shaggy dough. Shape into 2 disks and chill for at least 1 hour.
- Make the preserves. While dough is chilling, make the reserves! Add strawberries, sugar, lemon juice and zest to a medium sauce pan and simmer until preserves are thickened. Stir in vanilla and let the preserves cool.

- Roll and cut out pastry rectangles. Roll pie crusts out on a floured surface into large rectangles 1/8-inch thick. Use a ruler to trim dough into 5×3-inch rectangles. Collect and re-roll trimmings. You’ll need 16 rectangles to make 8 pop tarts.
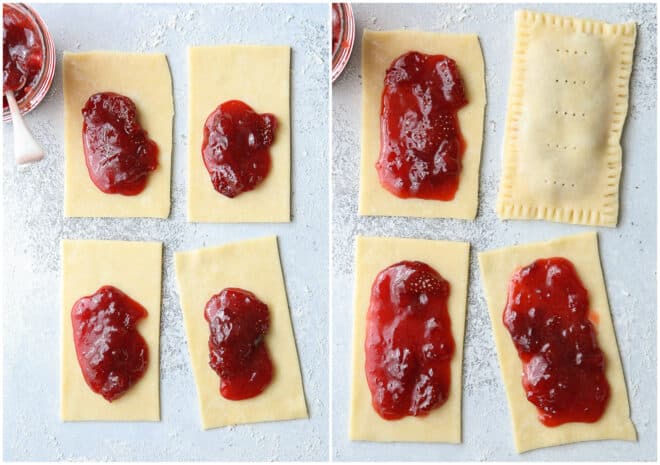
- Fill with preserves and crimp to seal. Spread a small amount of strawberry filling into the center of half of the rectangles, and top with the rest of the pastry. Use your fingers and then a fork to crimp edges to seal, and poke a few holes in the top so steam can escape.
- Bake. Place assembled pop tarts on a baking sheet pan and bake until golden, 25-30 minutes.
- Let cool, top with frosting and sprinkles. Make a quick glaze with powdered sugar and milk/cream (add a bit of preserves to make it pink) and drizzle it over the cooled pop tarts. Add sprinkles.
Recipe tips
- Use store-bought pie crust to make this dessert even easier. It won’t have quite the same “homemade” quality, but they’ll still be delicious!
- This recipe makes eight 6-inch pop tarts. You can make these pop tarts essentially any size, just know that baking time and yield will be affected.
- Flavor variations: Substitute the strawberry filling for other flavors, such as raspberry or blueberry. You can also use any jam or spreadable filling like Nutella.
- Make-ahead instructions: Freeze unbaked or baked pop tarts (with no frosting) in a single layer on a lined sheet pan, then transfer to a ziplock bag and store in the freezer for up to a month. Bake straight from frozen, or let baked pop tarts thaw at room temp and then crisp up in a toaster or warm oven.
Other mini pie recipes
- Blueberry Hand Pies
- Strawberry Rhubarb Hand Pies
- Mini Sour Cream Apple Pies
- Strawberry Nutella Hand Pies
Get the recipe

Strawberry Pop Tarts
Ingredients
Strawberry Preserves:
- 2 cups (335 grams) sliced strawberries , fresh or frozen
- 1 tablespoon lemon juice
- 1 tablespoon lemon zest
- ⅔ cup (130 grams) granulated sugar
- ½ teaspoon vanilla extract
Pie Crust:
- 2 cups (240 grams) all-purpose flour , plus more for rolling
- 1 teaspoon coarse salt
- 1 teaspoon granulated sugar
- 1 cup (226 grams) unsalted butter , cold and cut into cubes
- 4-5 tablespoons cold water
Strawberry Pop Tarts:
- 1 cup (340 grams) strawberry preserves , recipe above, or use store-bought
- double pie crust , recipe above, or use store-bought
- 1 large egg , lightly beaten (for egg wash, optional)
- 1 cup (113 grams) powdered sugar
- 1-2 tablespoons heavy cream or milk
- Rainbow sprinkles (optional)
Instructions
To make the pie crust:
- Combine the flour, salt, and sugar in a bowl. Add the cubed butter and cut into the dry ingredients with a pastry cutter, fork, or your fingers. Continue until the mixture resembles coarse sand and the butter is the size of small peas. Add the cold water a tablespoon at a time, mixing until the dough comes together into a ball. Divide into two and form each into a disk. Wrap in plastic wrap and chill in the fridge for at least 30 minutes.
To make the preserves:
- Meanwhile, prepare the preserves if making from scratch.
- Put the strawberries, lemon juice and zest, and sugar in a medium sauce pan and set over medium high heat. Stir and mash with a potato masher or large fork and bring to a boil. Boil for about 2-3 minutes until sugar is dissolved and combined with the mashed strawberries.
- Reduce heat to medium low. Continue to simmer for 10-15 minutes until thickened. Add vanilla extract.
- Cool to room temperature before spooning onto the prepared pastry squares. Any leftovers may be stored in the fridge for a few weeks.
To make the pop tarts:
- Preheat oven to 375°F and line a baking sheet pan with parchment paper.
- Remove one disk of dough and place on a lightly floured surface. Roll out into a large rectangle about to about 1/8th inch thick. Trim so edges are straight. Cut into 8 5×3-inch rectangles. Repeat with second disk. Gather trimmed dough scraps together and re-roll as needed.
- Spoon 1 ½ tablespoons of the preserves onto the pastry squares and cover with the remaining pastry squares. Press all edges together with your fingers to seal, then use a fork to double seal. Use a toothpick to poke holes in the tops of the pastries. Place on prepared sheet pan 1 inch apart. Brush with egg wash if desired for more color.
- Bake the pop tarts until golden, about 25-30 minutes.
- Cool completely on a wire rack.
- To make the frosting, whisk together powdered sugar and heavy cream/milk to make a thick but pour-able consistency. To make the frosting pink, add a spoonful of remaining strawberry preserves.
- Spread over cooled pop tarts and sprinkle with rainbow sprinkles. Frosting should set up in about 20 minutes, or more quickly if chilled in the fridge.
Video
Notes

Note: This recipe was originally published March 2011.

Only yielded 5 pop tarts. Size 3×5. only 5, not 8 pop tarts.
Is there any way to make this dough stretch to make 8 instead of 5?
Otherwise, very good.
Excellent recipe!! Used my own homemade jam. The crust was buttery and flaky!! Definitely will be making this again!!
Delicious and easy to make
We just made these and they’re delicious! One question I have is, how are these best stored? Refrigerator or can they be left on the counter in a covered container?
Excellent recipe! Will be added to our rotation of homemade treats 🙂
Hi Sabra! I’m so glad to hear you like this recipe. They can be stored at room temperature for a few days. They also freeze really well too! You can store them in the fridge but I think that would make the crust a little soft.
Made this recipe tonight. We were anxious to try them, so we didn’t wait for them to cool before frosting. They were so good. They weren’t too sweet and flaky. Yum! Will be making this recipe again and trying with different homemade jam’s.
This was amazing!!! I enjoyed making the crust from scratch and the jam. The crust was flaky. The jam was sweet but not too sweet. Recipe is a keeper! Thank you.
I love eating strawberries and the idea of making strawberry tarts is really cool. Me and my friend keep praising this dessert.
I made these and they were a great hit! Although I added less sugar and made them smaller so they would last longer. Hint: they didn’t 😀
Just wanted to mention, that you added an egg wash to the ingredients, but it was nowhere mentioned in the process after. I honestly forgot it as well, but they turned out great either way and I probably won’t add in the future either.
Hey Annalise, did you use egg wash to seal or before baking? Sometimes I have trouble baking pop tarts through properly….I’ll try your temp….Thanks ?
I love this idea! I’ve seen homemade pop tarts on the web, but they looked intimidating to make. You make it simple enough that I might be able to do it!
My daughter's friend just made these for her as a surprise…you're right…they are great, and yes even amazing! Love your photos!
These look delicious! Great pictures!