

How to cut a cake into even layers
Learn how to easily and accurately cut your cake in half into even layers. All you’ll need are simple tools you already have in your house to achieve perfectly stackable cake layers.
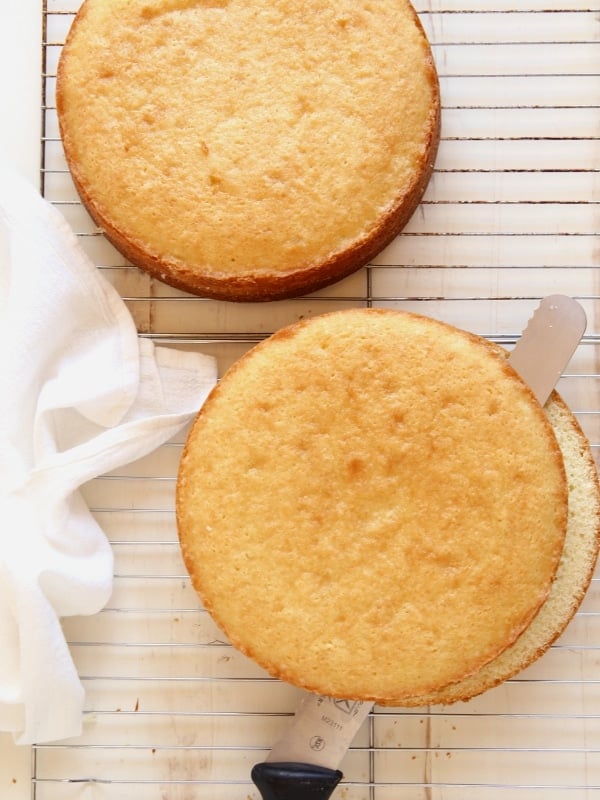
Want to make your layer cakes more impressive? Adding extra layers instantly makes any cake more exciting. Just as a two-layer cake looks more elegant than a basic sheet cake, three or four layers are even more extraordinary.
Instead of baking more individual cakes, which requires more pans and oven space, we’ll simply cut a single cake layer horizontally into two even layers. There are lots of different ways to do this, but my easy method requires just a few knives you already have in your kitchen.
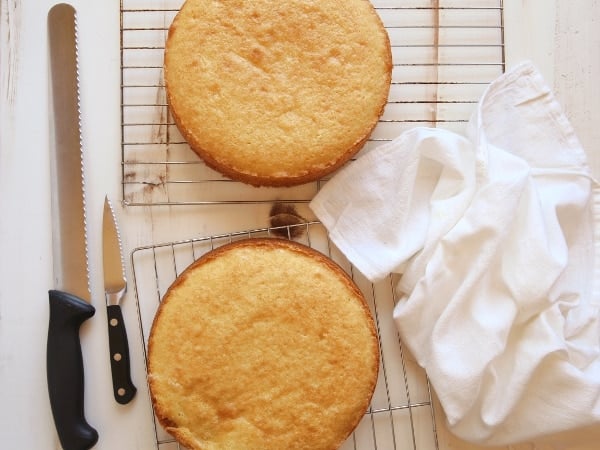
What you’ll need
- Small paring knife
- Large serrated knife
- Baked cake layers at least 2 inches tall (any thinner and they become harder to work with.)
Tip: Cakes are more firm, sturdier, and easier to handle when they have been chilled. If you are working with a delicate cake, or if you’re feeling apprehensive, chill your cake layers for at least one hour.
Remove cake dome first
I usually use this trick to bake my cakes with flat tops, but if your cake layers have a domed top you’ll need to remove them with a serrated knife before slicing the layers in half.
How to cut cake layers in half
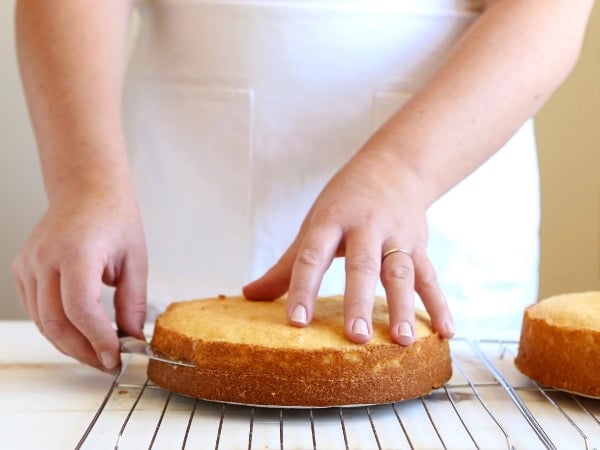
Step 1: Score a line to guide your cut
Think of this as tracing with pencil because going in with something more permanent. Use a small knife to score the entire outside edge of the cake halfway up the side. Go ahead an eyeball it, but go slowly, and get down at eye-level if necessary. Don’t cut too deeply, as this is simply serving as a marker.
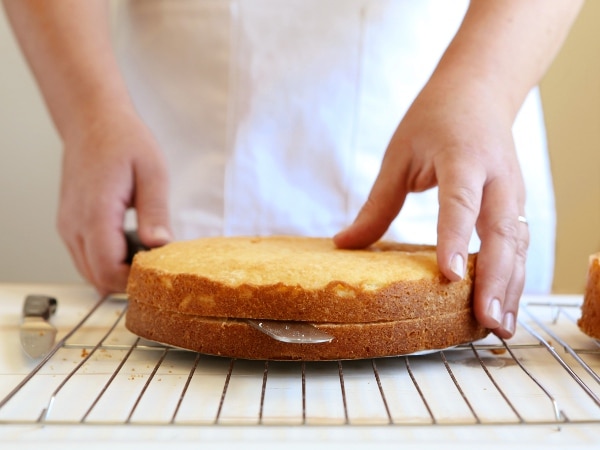
Step 2: Cut cake in half with large knife
Take the serrated knife and cut through the cake along the indentation made with the paring knife. Again, go slowly to maintain accuracy, there’s no need to rush. I recommend a knife that’s longer than the size of your cake so you can make longer even cuts, instead of smaller cuts which leave more room for error.
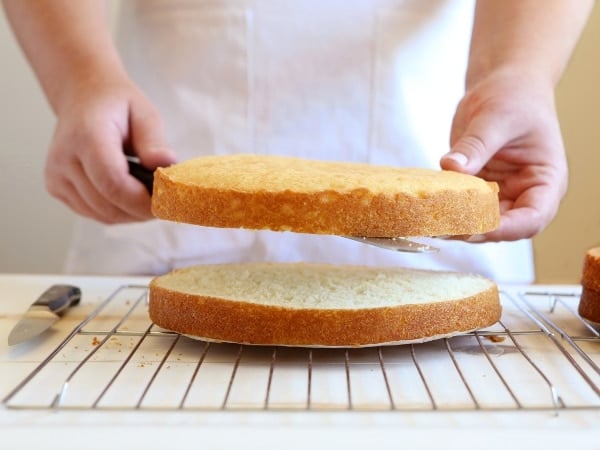
Step 3: Remove top layer
Use the knife to lift the top layer off of the bottom layer (another reason to use a large knife!). Your cake should be sturdy enough to lift easily without any buckling or crumbling, however if you’re working with a cake round larger than 8 or 9 inches, or cake layers that are extremely thin, you may need to use a little extra care.
Use split cake layers immediately
Once you expose the tender insides of cake, I feel that it dries out faster. So I only recommend cutting your cake layers right before you plan to assemble your cake.
Tip: If you want to bake your cake layers ahead of time before (before splitting and assembly), see all of my tips for freezing and storing cake layers here.
FAQs
Make sure you’re not trying to cut a cake that is too thin or delicate, and chill it in the fridge if necessary to keep it firm while slicing. If it still breaks or crumbles, you can always trim uneven edges or use frosting to smooth things out during assembly.
This happens sometimes to me, especially if I try to rush it (so don’t do that!). If your cut cake layers are uneven or have a slant to the cut, do your best to stack the layers during assembly so the uneven edges match up as closely as possible and achieve a flat top.
Yes, you are welcome to use a cake level tool if you want! This method is for people who don’t want to purchase and store a one-use tool.
Layer cake recipes
Now that you’re more comfortable working with baked cake layers, here are some cake recipes to try!

Next time I have great faith in this method 🙂 unfortunately my cake was entirely too dense this go around but it’s gonna be oh so very tasty. Lemon cake, lemon curd between the layers and frosted with lemon cream cheese frosting Yuuuuuuum have a great day and thank you very much for the technique
Thank you for the tip!! What do you recommend wrapping the cake up for other to freeze? Parchment, wax paper, foil, film??
I always cover in plastic wrap.
Thank you so much for teaching me how to cut a cake in layers. I’m making 3 nine inch cakes. But I need 2 cakes of 3 layers. I have a large group to make this for and I don’t want to bake 2 separate cakes as it gets expensive. I hope this works. Thank you again.
Terrific tip thank you
You mean “paring” knife. This did not work very well.
Most coconut cakes I see haves “Sheen” or shine on icing. Please tell me how to obtain this.
Not sure, it must be a specific kind of frosting.
Thank you. Now I need to know what is good to substitute for marscapone cheese and peanut butter.
I just made a chocolate cake from scratch, was able to find only 1 pan, this lesson is great, it is for the best son in the world, his birthday .
Thanks!
Yes! This is exactly why I shared this tip, sometimes you don’t have enough pans! So happy to hear it worked out for you. 🙂
First time to bake a cake with this recipe, and first time to split. Looking forward to splitting it in the morning after it being in the frig overnight. Thank you for all the tips!
Great tips! Thank you so kindly for sharing. I baked my cake last night & just put it in the fridge. I’ll be trying this out in a few hours. Thanks again! 🙂
Thanks so much for this tip – easy, and no special tools required. I’ll be trying it out in a couple days on my next order for a layer cake with filling! Another little trick I learned from a YouTube video I watched: If your round cake has domed too much during baking, and if you want the cake to be the height of the pan you baked it in: First, let the cake cool (or even chill or freeze it), and then cut off the dome *while the cake’s still in the pan.* The cake pan edge can serve as a level to rest your knife on while cutting.
This is such a great idea! Thanks so much for sharing, Connie! 🙂
Fab tutorial, and the flat top trick. My birthday baking season is coming up, Sept – Jan, will be using your tricks to great effect. Thanks
Kartina
I totally need this Annalise! great tutorial. My cakes are always cut so uneven and then I have to use cake scraps to build it up on the leaning side, sh don’t tell!! 🙂
Ha! Oh Karen, I’ve sooo been there. 🙂 You’ll have to let me know what you think if you give this method a go!
Awesome! Thanks for the tutorial. Looks simple enough that I might not mess it up 🙂
Yay! This is EXACTLY what I would do if I were trying to cut cake layers! I haven’t tried to do it yet, but my instinct was that I should trace the line first so I could be sure it was level all the way around. I’ve seen those fancy hacksaw things in the decorating aisle and thought, no, now they’re going past the problem and making it more complicated than it needs to be. Ooh, I’m glad you posted this. Next time I need to make a cake I’m going for it.