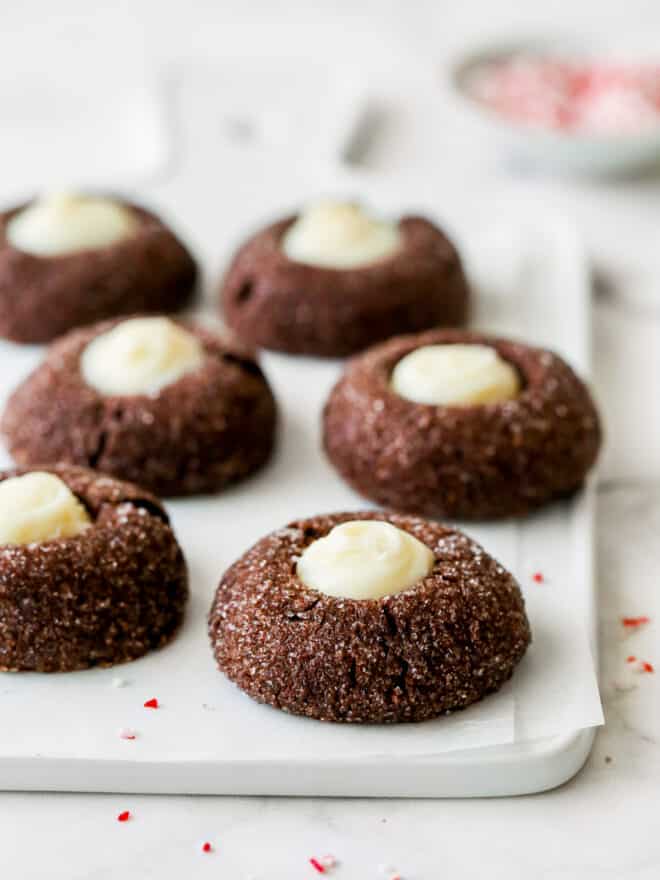
Chocolate Mint Thumbprint Cookies
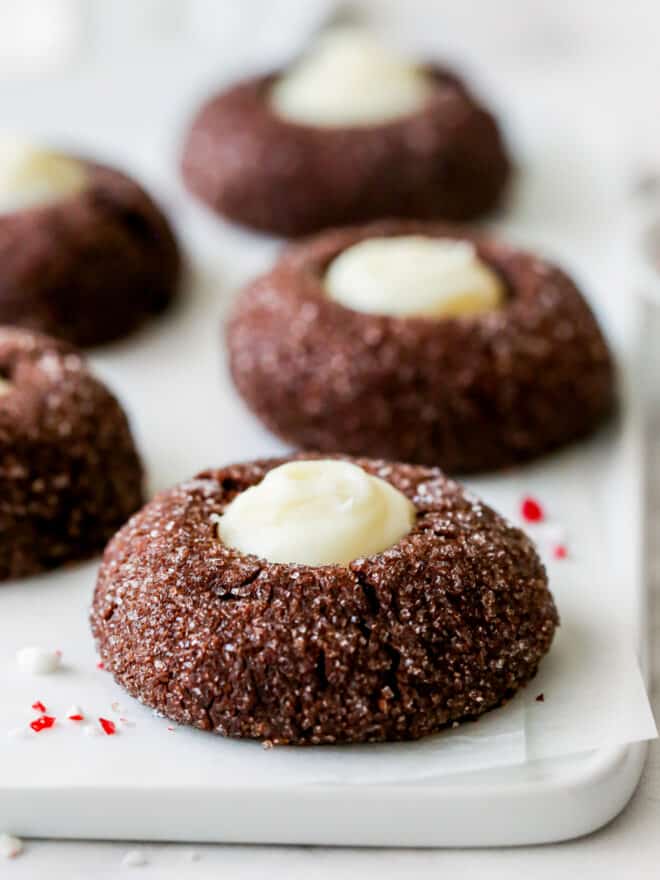
Dark chocolate thumbprint cookies filled with peppermint white chocolate ganache in the center are perfect for the holidays, or any time of year!
If you’re looking for a unique but festive cookie to add to your Christmas cookie swap or holiday party, these are it! These chocolate mint thumbprint cookies are a little bit different but still perfect for the season.
They combine a super chocolaty thumbprint cookie (made with both melted dark chocolate and cocoa powder in the dough) with smooth and creamy peppermint white chocolate. These thumbprints are a delicious combo of flavors and textures, and I promise you’ll love them as much as we do!
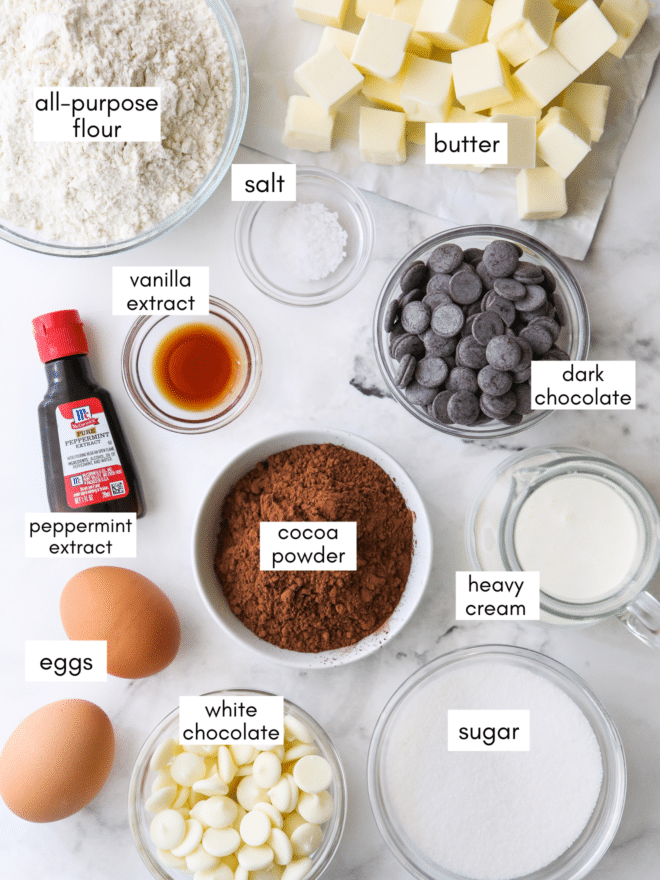
Ingredients you’ll need
Here’s everything required to make these chocolate mint thumbprints (full recipe at the bottom of this article):
How to make chocolate mint thumbprint cookies
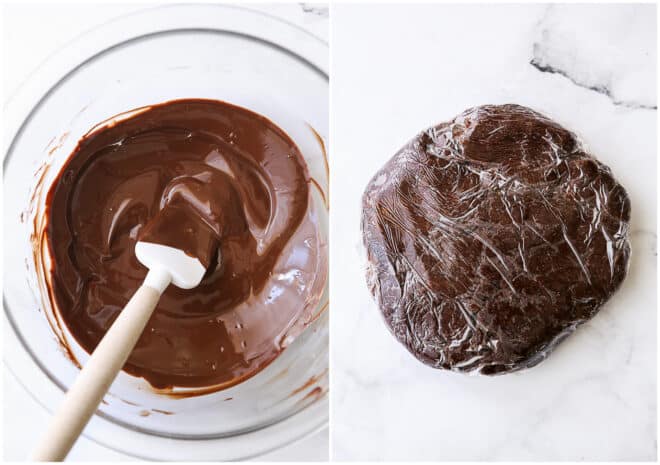
- Melt chocolate. You can use either a double boiler or microwave. Melt chocolate until just a few lumps remain, then stir until smooth.
- Prepare cookie dough. This recipe uses the creaming method and is really easy to make with the help of a stand mixer or hand-held electric mixer.

- Chill dough. Let the dough rest in the fridge for 30-60 minutes to firm up slightly so cookies will hold their shape.
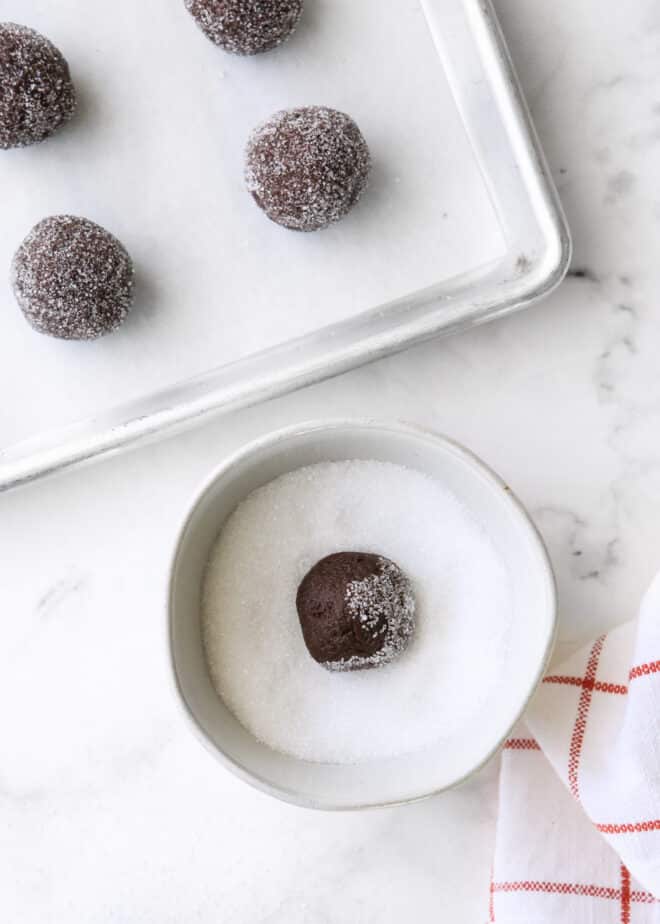
- Roll dough balls in sugar and make a thumbprint. Roll into rounded tablespoons and roll each cookie dough ball in coarse or sanding sugar to coat. Place on a baking sheet pan and press a slight indent into each cookie.


- Bake. Bake at 350°F for about 12 minutes total, pressing down the center of the thumbprints about halfway through baking and again when they come out of the oven, just to push down any parts that puffed up.
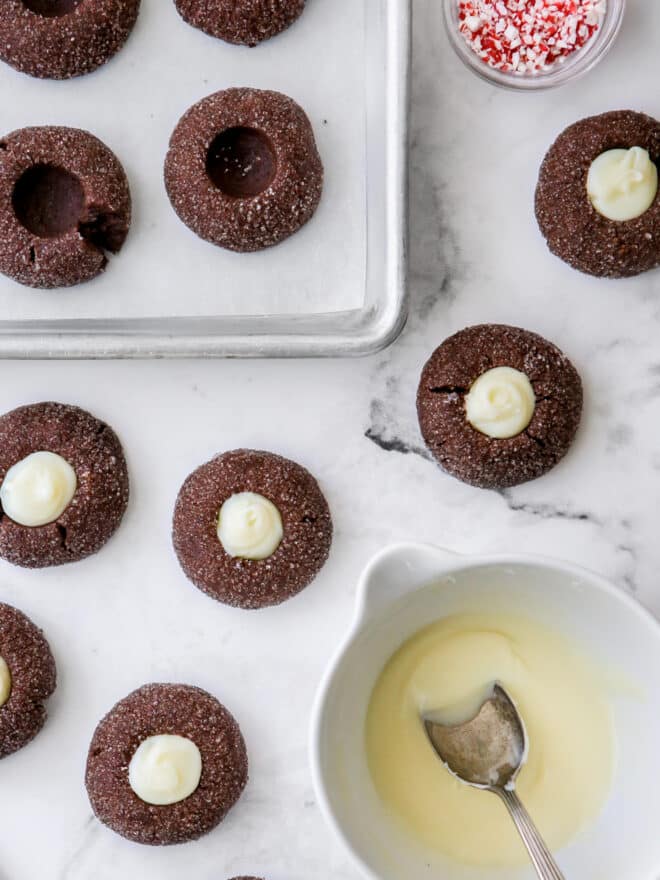
- Make ganache. Heat cream till steaming, them pour over white chocolate. Let sit for a few minutes, then stir until smooth.
- Add ganache to thumbprints. Let ganache cool slightly to thicken, then spoon it into the center of each chocolatethumbprint cookie. Give the ganache filling at least 15 minutes before serving.
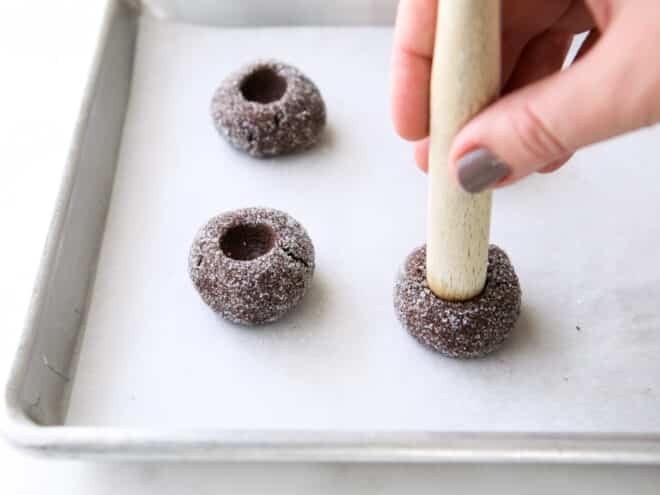
baking tip:Making thumbprint cookies
More tips for this recipe
- I recommend using higher quality chocolate chips or chopped bar chocolate for both the dark chocolate and white chocolate (make sure the white chocolate contains “cocoa butter” and not a substitute like “palm oil”).
- When making the first indent into the cookie dough, only press about halfway down. Don’t press so far that the cookie ball cracks wide open, but a few small cracks are okay.
- The white chocolate ganache will have an almost yellow tint when first melted, but as it thickens it will turn more opaque and white. If you want a thicker white ganache, let it cool for about 15 minutes, stirring often, before adding to the cookies.
- These chocolate mint thumbprints would also be delicious filled with dark chocolate ganache instead of white. Follow the recipe, swapping chopped chocolate for the white.
- If you want to add a final festive touch to these chocolate mint cookies, top ganache with some crushed candy cane pieces.
- The chocolate cookies without ganache freeze very well. Store in a freezer bag for about a month. When ready to serve, let thaw at room temperature and add ganache filling.

More cookies with peppermint
If you’re a fan of chocolate + peppermint, then you’ll love these cookie recipes!
- Peppermint White Chocolate Chip Cookies
- Chocolate Candy Cane Sandwich Cookies
- Chocolate Mint Chip Cookies
Shop tools for this recipe
This recipe was originally published December 2013.

Chocolate Mint Thumbprint Cookies
Ingredients
For the chocolate cookies:
- 4 ounces dark chocolate , chopped (110 grams)
- 1 ½ cup all-purpose flour (190 grams)
- ½ cup cocoa powder (40 grams)
- ¾ teaspoon salt
- 1 cup unsalted butter , at room temperature (226 grams)
- ⅓ cup granulated sugar (65 grams)
- 2 tablespoons packed light or dark brown sugar
- 2 large egg yolks
- 1 teaspoon vanilla extract
- ½ teaspoon peppermint extract
- Coarse sugar , for rolling
For the filling:
- 3 ounces white chocolate , chopped (85 grams)
- 3 tablespoons heavy cream
- ½ teaspoon peppermint extract
Instructions
To make the cookies:
- In a double boiler or heat proof bowl set over a pan of simmering water, melt the chocolate. Stir until smooth, then remove from heat to cool slightly.
- In a bowl, sift together the flour, cocoa powder, and salt. In the bowl of a stand mixer fitted with a paddle attachment, beat the butter and sugar and brown sugar together on medium high speed until light and fluffy. Add the egg yolks one at a time, mixing after each, followed by the vanilla and peppermint extracts.
- Add the melted chocolate and mix until combined. Add the flour mixture all at once and mix until just combined. Form the dough into a disk and wrap in plastic wrap. Chill in the fridge for at least 30 minutes.
- Preheat oven to 350°F. Line a sheet pan with parchment paper.
- Roll the dough into rounded tablespoons and roll in the course sugar. Place on the prepared sheet pan and use your thumb or a dowel to create a well in the center of each cookie.
- Bake for 10 minutes, then remove from the oven and reinforce indents with your thumb or dowel. Return to oven and bake for an additional 4-5 minutes, just until cracks begin to form in the cookies. Remove from oven and reinforce the indents again. Let cool completely on a cooling rack.
To make the filling:
- In the microwave, heat the cream for about 30 seconds until boiling. Pour over the chocolate, let sit for 2 minutes, then stir until smooth. Stir in the peppermint extract.
- Pour the filling into the cooled cookies. Let cookies firm up in the fridge for 15 minutes. Store cookies at room temperature in an airtight container for up to several days.

loved these and they looked just absolutely perfect!!
Love the thumbprint tip. I normally use the back of a round teaspoon, but never thought to check while the cookies were in the oven and after. Thanks!
These were gorgeous! I say were because they are long gone in my tummy! I could eat the entire bowl of the creamy mint filling!
The filling looks especially delicious! I cannot wait to try these for neighbor treats
These were perfect and pretty to boot. Can’t beat that now can we? The texture of the cookie when perfect with that creamy middle. Mmm.
Wow they look great! I am going to try them this week. Thanks
I am eager to try these! What technique did you use to pour the filling in? By the way, I really appreciate the “Baking Tip” feature on your blogs. Thank you!
I just used a spoon, but you could use a pour-able measuring cup. And thanks!
These cookies look so good!! And, thank you for the baking tip; I never thought about checking the indentation while the cookies are in the oven.
I have found that the best way to make a well or thumbprint in cookie dough is with a bottle cork, lightly dipped in flour first. Can’t wait to try these!
What a great suggestion, thanks!
I love how perfect are your thumbprints. Will have to use a wooden spoon next time, thanks for the tip.
The cookies look amazing. Would love if you could bring them to this month chocolate party http://www.roxanashomebaking.com/peppermint-chocolate-cake-recipe-chocolateparty
I really like the crunch of that coarse sugar and a white chocolate filling?! Just perfect…
I made these delightful cookies today to give as gifts to neighbors and coworkers. My family had a hard time parting with them, though, for these treats are “completely delicious!”
YUM. My mom makes a version of these. It’s not a Christmas without them.
a few questions…i have an unsweetened baking chocolate bar on hand, do you think that will work in place of the dark chocolate if i just add a little more sugar? also, do you think half-and-half will work in place of the heavy cream? trying to work with what i have already 🙂
You can substitute the unsweetened chocolate, though I’m not sure how much sugar you should add. I’m start with something like 1/2 cup. And for the ganache filling, it needs the fat in heavy cream to thicken properly, so if you substitute half and half for the cream, I would add about 1/2 Tbsp unsalted butter. Good luck!
My cookies keep spreading out into crispy wafers. The oven temp is exactly 350. I even put the cookies and the tray in the freezer for 10 minutes before putting them into the oven. Any tips?
I made two batches, followed the recipe to a “T” both times and the cookies are rubbish. Wrong texture for a thumbprint cookie, and off taste. Won’t make again.