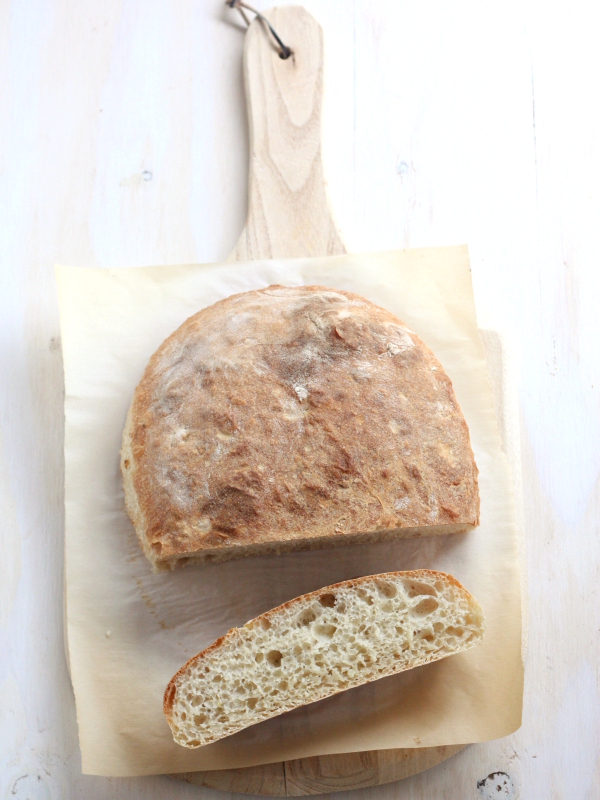
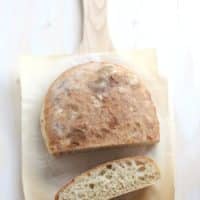
Roasted Garlic Ciabatta Bread
This garlicky spin on classic ciabatta bread, with it’s chewy and porous texture, is perfect for sandwiches and mopping up sauce.
Thanks to my partnership with Red Star Yeast over the last few years, I have made huge strides in my bread baking. What once scared me to death, I now feel like I can almost do in my sleep. It’s incredible what practice can do. That being said, I still have a lot to learn and many more recipes to explore.
So when Red Star Yeast approached me about developing a ciabatta bread recipe, I jumped at the chance to stretch my comfort zone even farther.
While researching ciabatta, I was surprised to learn that it was only invented in 1982— coincidentally the same year I was born. Bread has been around for centuries, but I like knowing that new stuff is still happening.
Ciabatta is characterized by it’s broad flat loaves, chewy texture, and holey interior. It’s definitely one of my favorites for sandwiches (and everything), although this is the first time I’ve baked it myself. And it was perfect.
I love how the roasted garlic practically melts into the dough of this variation. It’s subtle, but there for sure, and it’s scrumptious.

It’s not very difficult to create, but ciabatta does require a bit more attention than other simpler yeast breads.
A few recipe notes:
>>It does require the forethought to begin a starter or biga the night before you want to bake the bread. Letting it sit overnight helps develop the flavor and texture, definitely worth it. The next day the biga will be soupy with a bubbly surface.
>>The dough is very wet, almost like a batter, and cannot be kneaded by hand. A stand mixer is your best bet.
>>Because it is such a wet dough, it is kneaded on a higher speed than usual. Watch your mixer to make sure it doesn’t wobble off the counter!
>>As you work with the dough with your hands, be as gentle as possible. You want to keep all of those bubbles you can see under the surface intact.
>>Not a fan of garlic? Feel free to leave it out!
>>If you need any help getting started with baking yeast breads, I love the section on Red Star Yeast’s site dedicated to Lessons in Yeast & Baking. Lots of great help!

Roasted Garlic Ciabatta Bread
Ingredients
Overnight starter:
- ½ cup water (118 ml)
- ½ teaspoon Red Star Active Dry Yeast
- ¾ cup bread flour (90 grams)
Bread:
- 1 head of garlic
- 2 cups water (475 ml)
- 1 teaspoon Red Star Active Dry Yeast
- Starter , from above
- 4 cups bread flour (480 grams)
- 2 teaspoons salt
- 1 teaspoon granulated sugar
Instructions
To make the starter:
- Dissolve the yeast in the water. Add the bread flour and stir to make a wet dough. Cover with plastic wrap and let sit at room temperature for at least 8 hours and up to 15 hours. The next day the starter should be soupy with a bubbly surface.
To make the bread:
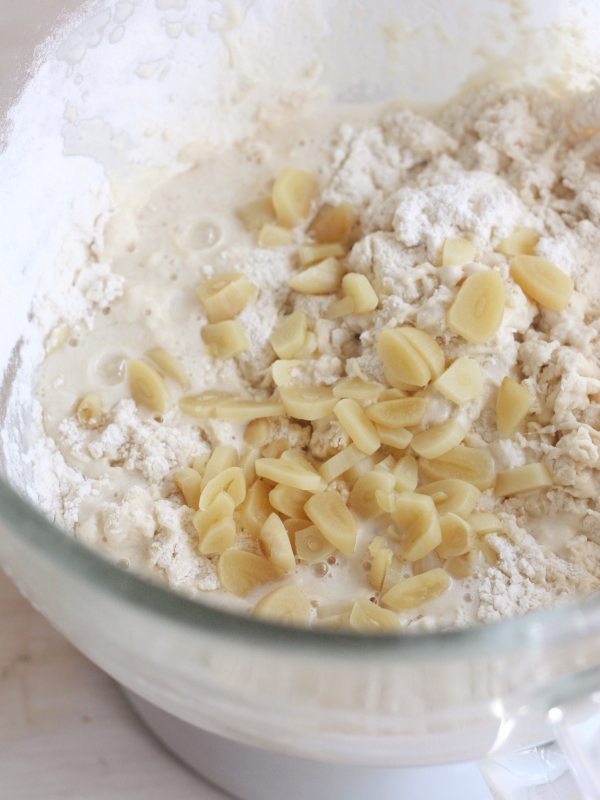
- Preheat oven to 350°F. Wrap the garlic in foil and bake for about 30 minutes until fragrant. Let cool, then slip garlic cloves out of their skins and roughly chop.
- In the bowl of a stand mixer fitted with a dough hook, dissolve the yeast in the water. Add all of the starter and use a dough whisk or spatula to break it up into the water. It doesn't have to completely dissolve into the water.
- Add the bread flour, salt, sugar, and chopped garlic. Knead the dough with the mixer on medium speed for about 12-15 minutes. At first the dough will be very wet, but eventually it will thicken somewhat and clear the sides of the bowl, and turn glossy and smooth. When you turn off the mixer, it will pool at the bottom of the bowl, and that's okay.
- Cover the bowl with plastic wrap and let rise in a warm place until tripled, about 1 ½ hours.
- With generously floured hands, scoop the dough out of the bowl onto a floured surface. Divide the dough in two. Working very gently, and re-flouring your hands as necessary, shape dough into oblong loaves and place each on a sheet pan lined with parchment paper.
- Let rise, uncovered, until doubled, about 45 minutes. Meanwhile, preheat oven to 475°F.
- Bake until golden brown and sounds hollow when tapped, 20-25 minutes. Let cool slightly and serve warm or at room temperature. Store in an airtight container at room temperature for up to 3 days.
Disclosure: This recipe was developed in partnership with Red Star Yeast. All opinions are my own, as always. Thank you for supporting partnerships with brands I believe in.
Be sure to visit Red Star Yeast on their website, and follow them on Twitter, Facebook, Pinterest and Google+.

Yum nothing like a home made bread to warm the soul. I love the addition of garlic here; it would be a great flavor booster.
Mmm this bread looks fabulous!
All of that garlic makes me SO SO happy!! And the finished bread seriously looks like perfection.
Thanks Sues! Roasted garlic really is a wonderful thing, isn’t it? 🙂
Roasted Garlic. Ciabatta bread. You’re speaking to my heart. I love everything about this. We just moved, and as soon as our stuff gets delivered, (including my mixer!), I’m making this! My husband will go as crazy over this as I will!
Oh I would go crazy without my mixer! Hope it gets unpacked soon. Happy baking! 🙂
Annalise,
This bread is fabulous! I love Ciabatta bread and roasted garlic too.
Annamaria
Am I missing something? I don’t see how long the baking time is.
I’m sorry, it is 20-25 minutes.
I’ve made ciabatta once and it was excellent. I can’t wait to try it this way too.
I just attempted this bread and I failed miserably… Not sure what went wrong but the dough never came together. It was a goopy mess. Pretty bummed out since I roasted the garlic and made the starter the night before and woke up super excited to make this. I didn’t weigh the flour but measured it with a measuring cup. I double checked my amounts on everything. I live in Florida and it’s pretty warm here today. Not sure if this would have a negative affect or not. Any helpful advice is welcome! I’m reluctant to try again.
The dough is supposed to be a goopy mess. It’s hard to know for sure since I wasn’t with you when you attempted this recipe, but I’m wondering if you did everything right and were just thrown by how unusual ciabatta bread dough looks. It’s more like a thick batter. The dough has “come together” once it clears the side of the bowl as it’s being kneaded, and you can hear it slapping around. But when you turn off the mixer, it will still puddle at the bottom of the bowl. Since it’s so wet, you need to handle with care, and well-floured hands. I’m so sorry you had trouble with this recipe! If you attempt it again, please let me know how it goes!
This is why you should open a bakery!! Mad skills, girl. Mad skills!
I’m still super scared to bake bread. I’ve only dealt with yeast once!
Just finished baking roasted garlic ciabatta bread, Wow, looks just like your picture. Smells wonderful too. letting cool abit before tasting…..
If I already have a starter I want to use.. how much would I need to make this recipe?
Seriously the best ciabatta I have ever had. Only difference I added a light egg wash to crisp and shine but fantastic recipe!
What if i don’t own a stand mixer? can I still make this by stirring for a long time with a wooden spoon (or some other option?)
I have tried making this bread two or three times and each time it pours out of the bowl there’s no kneading, I couldn’t even pick it up I have to scoop it and plop it onto the cookie sheet, I cannot even shape it into an oblong. It never comes away from the side of the mixing bowl so it’s needing in the bowl. I added more flour and that still doesn’t help. It almost seems like it needs another 2 cups of flour! Help, what am I doing wrong?
Hi Andrea! I’m sorry you’re having trouble with this recipe, but it doesn’t sound like you’re doing anything wrong. Ciabatta is a VERY wet dough and can be hard to work with, at least until you’re used to it and more comfortable. Practice makes perfect! Perhaps I need to clarify my instructions some, because you actually need to work it very little once it’s risen. Here are a few videos of some professional bakers working their ciabatta, and you can see it is very soft and loose, and it does “plop” out of the bowl. They use a lot of flour and bench scraper to move it and “shape” it, but you don’t need to do much shaping actually.
https://youtu.be/xDZokQG0VZ4
https://youtu.be/d4NfYiVN_N0
If you add more flour, you’ll loose the texture of the ciabatta and it will be more dense and less bubbly inside. Error on the side of “ugly” unshaped loaves that have great flavor and texture. I hope this helps some? Feel free to email me anytime at completelydelicious@gmail.com with more questions and trouble shooting. Now I’m itching to make this bread again and see how it goes, it’s been a while. 🙂 Wishing you all the best!
I am surprised the world can’t hear me swearing from this recipe. I had just made 3 red star yeast ciabatta breads last week that went so well that when I saw this recipe, I thought, yum!
What a mess! I probably clogged up my sink with all the goopy muck. You can’t even form this dough into a shape without tons of flour under and over. 2 cups of water seems excessive and I do read the comments before I started but was confident because some of them were positive. I give a thumbs up to the person who wrote how soupy this dough is.