Homemade Burger Buns
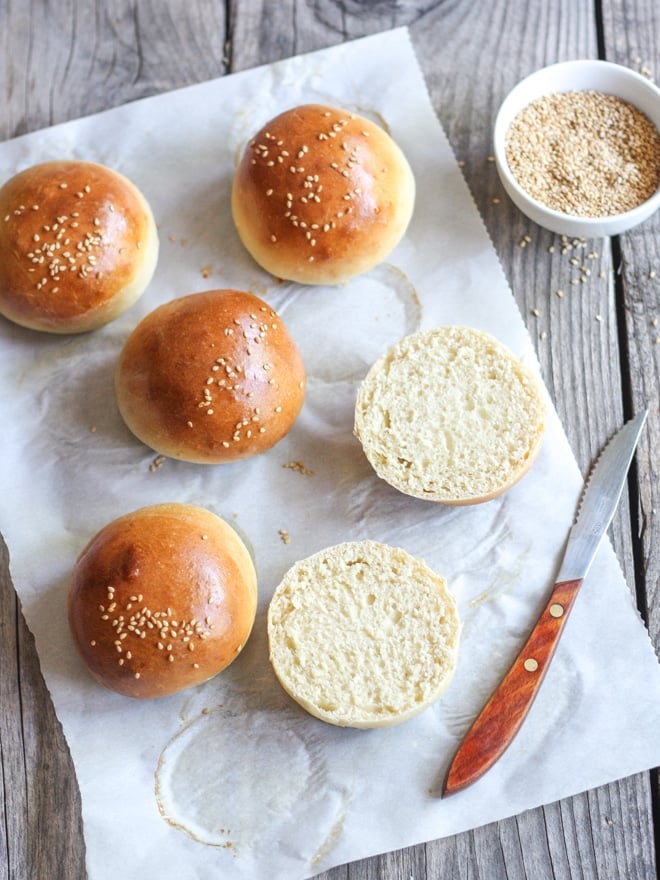
These homemade burger buns are soft and flavorful, and can be used for hamburgers, sliders, sandwiches and more!

Looking to elevate your next summer cookout? Homemade burger buns are the way to go!
Skip the bland generic ones from the grocery store and make your own— they’re SO MUCH better! These homemade buns are made with a basic brioche dough so they’re soft and tender, and actually have a lot of rich flavor all on their own. They’re the perfect starting point for filling with your favorite burger fixings at your next burger bar. Or use them however you like!
Keep reading to see how easy homemade buns are to make at home. And be sure to check out my other homemade bun recipes— whole wheat brioche burger buns, cheesy herb burger buns, and homemade hot dog buns.
What is brioche dough?
Brioche is a type of “enchriched dough” meaning it has a extra fat (from butter and milk) and sugar. I use brioche in these burger buns because it yields super soft and flavorful buns, similar to what you’d buy at the store.
How to make homemade burger buns
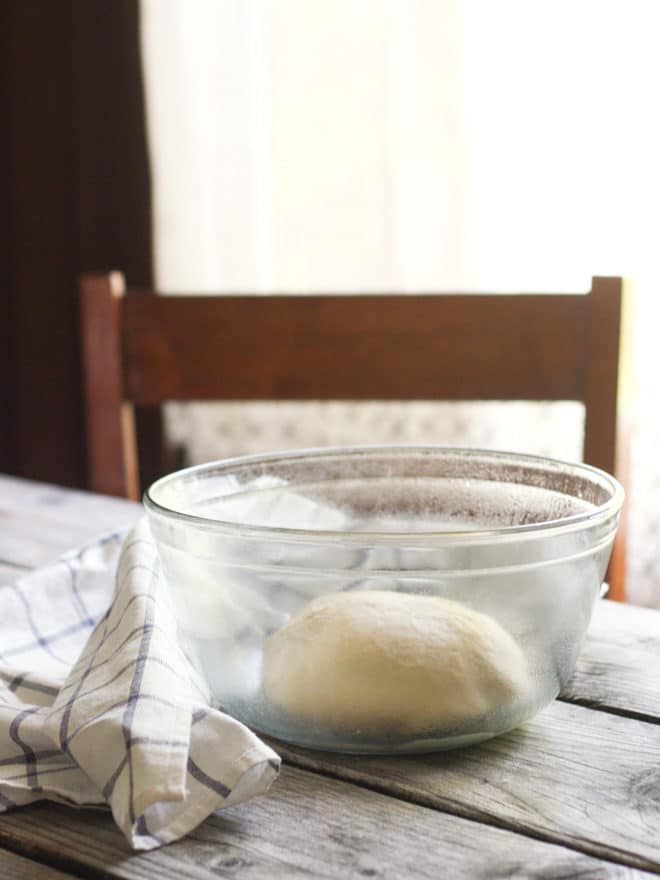
1. Prepare brioche dough. See my recipe for full instructions. Brioche dough is very soft and almost buttery feeling. It should be quite sticky to the touch, but not come apart and stick to your fingers. Be careful not to add too much flour or your buns will be tough and dry.
2. Let dough rise. Set it aside in a warm place for about an hour, until an indent remains when pressed with a finger.
3. Portion and shape buns. Using a scale is the best way to ensure all buns are the same size. Just weigh all of the dough and divide by 8. Once dough is divided evenly, pull and tuck dough until top is completely smooth (here’s a video if you need a little help).
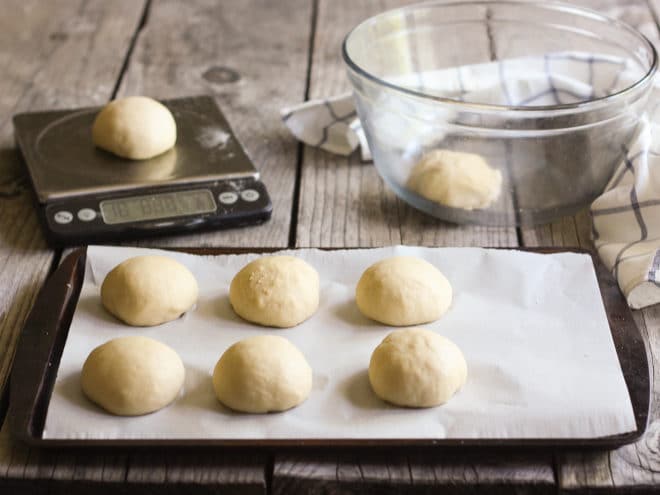
4. Let buns rise again. Cover with plastic wrap and let the buns rise while you preheat the oven to 400°F.
5. Flatten tops gently. While buns are rising, very gently press down on the tops of the buns 2-3 times to encourage buns to expand outward instead of up. This will give them their characteristic hamburger bun shape. Be careful not to push so hard that you deflate the buns or they will not rise.
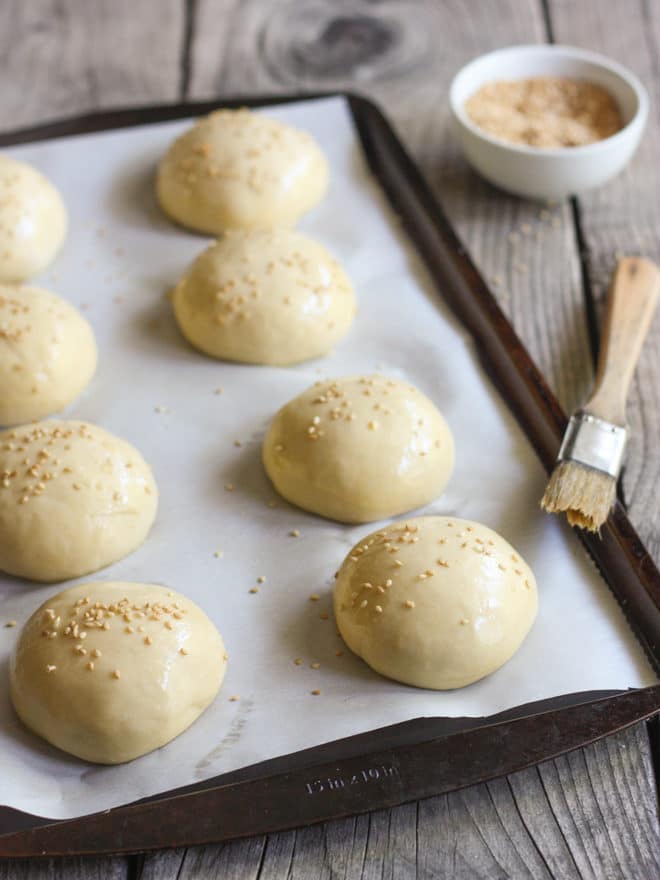
6. Brush with egg wash. Egg wash is a quick combination of egg and water that you brush onto the tops right before baking. This is important because it gives the buns a nice golden color and gives the sesame seeds something to adhere to.
7. Sprinkle with sesame seeds. This is optional, but it’ll give you that classic bun look.
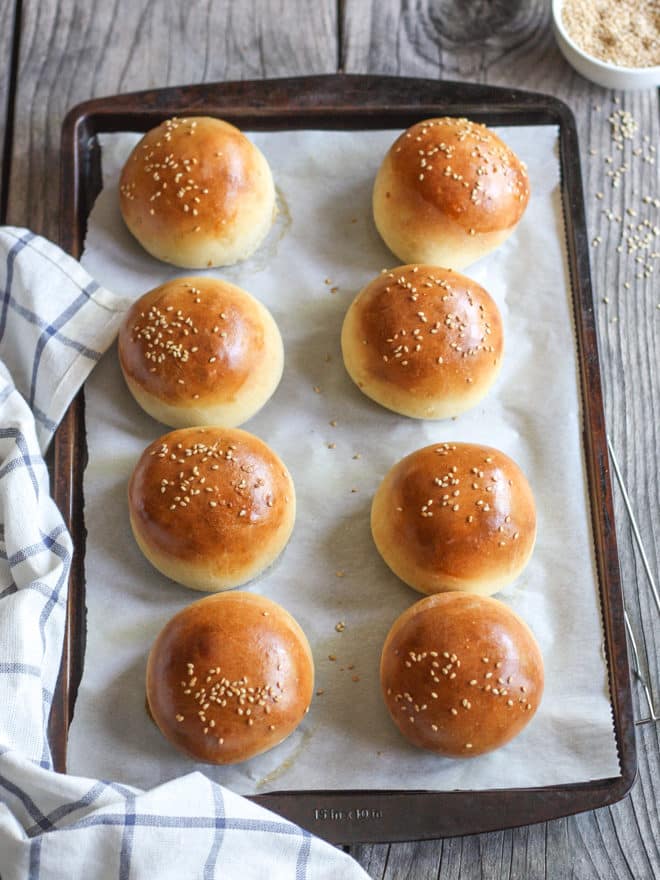
8. Bake. Bake the buns until the tops are golden brown, about 10 minutes. Let the buns cool completely before using.
How to make these burger buns in advance
These homemade buns are best enjoyed the day they are baked, but will keep at room temperature for several days. But they also store really well in the fridge or freezer if you want to prep them ahead of time!
How to chill or freeze buns for baking later
Shape buns as directed. Wrap buns in plastic and chill in the fridge for up to 12 hours, letting them come to room temperature for 1 hour before baking. If freezing, double wrap in plastic, and freeze for up to 1 month. Let thaw in fridge or on counter before baking.
How to freeze baked buns
Store cooled buns in a freezer ziplock bag or double wrap with plastic. Freeze for a month or more. Let thaw at room temperature or warm in a 350°F oven (covered with foil) for about 20 minutes.
Shop Tools for this Recipe
This post was originally published in July 2010. Pictures have been updated and slight improvements have been made to the recipe.
Burger Buns
Ingredients
- 3 tablespoons milk (45 ml)
- 1 cup water (235 ml)
- 2 ½ tablespoons unsalted butter (35 grams)
- 3 ½ cups bread flour (420 grams)
- 2 ¼ teaspoons active dry yeast (1 envelope, 7 grams)
- 2 ½ tablespoons granulated sugar (37 grams)
- 1 ½ teaspoon salt
- 2 large eggs , beaten
- 1 large egg , beaten with 2 tablespoons water, for egg wash
- Sesame seeds , optional
Instructions
- In a small saucepan, combine the milk, water, and butter. Warm over medium heat until butter is melted. Cool for about 5 minutes, or until temperature is 120-130°F.
- In the bowl of a stand mixer fitted with a dough hook (or in a large bowl if planning to mix by hand), combine 2 cups of the bread flour, the yeast, sugar and salt. Add the warm water mixture, followed by the beaten eggs, mixing on low speed until incorporated.
- Add the remaining bread flour 2 tablespoons at a time while mixing on medium low speed until dough almost clears the bowl and is only a slightly sticky to the touch (It's okay if some dough sticks to your fingers). You may not need all of the remaining flour, or you may need more than is called for. Knead until smooth and elastic, about 5-7 minutes more.
- Gather dough into a ball and place in a greased bowl. Cover with plastic wrap and put in a warm place and allow to rise until doubled, 1 to 2 hours.
- Punch down dough and let rest for a few minutes. Divide dough into eight equal pieces and shape into balls. Place on a sheet pan lined with parchment paper. Spray some plastic wrap with non-stick cooking spray and place over the shaped buns. Return to a warm place and continue to rise for an additional 30 minutes to 1 hour.
- When ready to bake, preheat oven to 400°F. Brush buns with egg wash and sprinkle with sesame seeds, if desired.
- Bake until golden brown, about 10 minutes. Cool completely on a wire rack.

These look delicious and perfect! I'd be totally ok with eating the buns alone.
Those are some cute buns you've got there, haha! 😉 This is a great recipe, and it looks like the perfect compliment to a juicy summer burger hot off the grill!
I am doing a 30 day food challenge on my blog for the month of august. I am looking for people to contribute recipes over that time. If you are interested please either leave a comment here or email me at boblyns at yahoo dot com
You can find out more information here on my blog at http://iamonly1woman.blogspot.com
Thanks
Bobbie
http://www.avisiontoremember.etsy.com
http://www.iamonly1woman.blogspot.com
The hamburger buns look amazing! So much better than anything store bought I have ever seen! Thanks for posting this.
I have prepared the burger buns and are delicious! Thanks for the recipe!
These burgers are such cuties, plus you got me really interested when talking about that gas grill turned into improvised oven…Oh, and your baby is just sooo adorable in his tiny pool!
xo, Elisa
Thanks Elisa! Look for a post on how to turn your grill into an oven next week!
Man, these buns look perfect! And don’t worry – I am the worlds biggest wuss when it comes to the heat. Have no shame!
Haha, glad I’m not the only one!
I’m pinning the crap out of this. I’ve NEVER seen homemade buns turn out so gorgeous. LOVE!
Thanks, Carrian! You’ll have to let me know what you think if you try them.
These are beautiful buns!!! YUM!!!
These look perfect! So beautiful, as much as I love burger buns, I doubt I could make them look this great!
They’re really not all that difficult, you should try them! 🙂
These buns look so much better than store bought 🙂 This is definitely something I’d want to make.
Sooo much better than store-bought!
I’ve always wanted to make my own burger buns! Especially for sliders. These look beautiful 🙂
These are perfect for sliders! Thanks, Sues!
These are simply lovely!!
These do look lovely but if Im going to take the time to make my own, Id want them to be whole wheat buns…. much healthier.
Beautiful buns. They are going to be great for some juicy burgers. Thanks for sharing.
I’ve been wanting to try something like this for so long! These look delish!
They look so perfect and fluffy!
To me, the bun SO makes for a perfect burger. Looks like you nailed this one!
Heat?? Don’t be a wuz girl, our heat (Vietnam) is around 110 deg in summer here with average humidity of 70-80% most days. And we have a commercial pizza oven going 6 to 8 hours a day ha ha…
We didn’t even think about burger buns til our one and only supplier went down for two weeks – now we’re told they may be closing. Our little cafe is on the central coast…in the middle of no-where. My wife and I talked and we only need about 20-30 buns a week; I went looking and tripped across your blog.
Just pulled the first batch out of the oven an hour ago and we were impressed! Very nice! Phuong makes all of the pizza dough so she can do this in her sleep. Everything is a little off here so we will have to make a few minor adjustments to get them ‘lighter’ however; yours was the recipe we were looking for. Brilliant!
In my defense, this summer has been hotter than I can ever remember it being. And yes, I am a wuss! 🙂
I’m so glad to hear that you like the recipe and have had success using it your cafe! Do you have any pictures? I’d love to see! Email to completelydelicious@gmail.com.
Nice reply. We worked on some ‘tweaks’ yesterday and are doing another batch today with a few more…everything here is a challenge. We get to eat all of the mistakes anyway!!
Served a few last night and they were received well however, like the pizza dough, we know they can be better – it’s a matter of fitting the recipe to what’s available for products to make it.
Yep I can send some pics and will, if you want a look at the only joint where you can get a decent burger or pizza within about 400 km just type Bob’s cafe American, Vietnam into facebook – brings up the page for the cafe.
Cheers, Bob and Phuong!
These look AMAZING. I have to agree with a previous poster, these are possibly the best looking homemade burger buns that I’ve ever seen.
I plan on making them later this week for a bbq! As much as I’d like to make them the day-of, I need to make 2 dozen – a lot of buns for my kitchen. They probably won’t be “the best” being a day old, but I’m sure they’ll still be fabulous. Did you eat them all the same day or have you kept them for an extended period of time (2 days) before?
I’m sure we’ve had leftover buns before that we’ve used the next day or maybe even later. You’re right, the flavor is best the day they’re baked but you should be fine.
Another option, in case you’re interested, is to prepare the bun dough the day before. Proceed with the recipe as is right up to shaping them. Once they’re shaped, place them on a baking sheet and wrap in plastic wrap and put in the fridge overnight. The next morning, let them come to room temperature before baking. Might help you save some time!
Hello from a beef farm in Wiltshire (UK), I googled burger bun recipe appealed because I love brioche-y buns and wanted then to look authentic. We have lots of beef burgers and I wanted to make buns to serve with them when we have guests. I followed recipe earnestly (except had only normal plain flour rather than strong). My mix was sticky so I added extra flour but remained sticky throughout so they spread on the tray. Anyway this was the result https://twitter.com/clearlyam/status/371747762972684288. I’m pleased with the look. The proof will be in the eating tomorrow!!! Thank you
This recipe is terrific. Made this for dinner today. We don’t get bread flour easily in India so the APF quantity used was more than that in the recipe, but got a lovely crust and a crumb.. Thanks a lot!
Hi 🙂
I made these yesterday and they are great! I have linked back to your blog, you can see it here:
http://my-full-house.blogspot.dk/2013/09/pyszne-domowe-buki-do-burgerow.html
Very best greetings from a Polish girl living in Denmark 🙂
Kasia
They look great, thanks so much for sharing!
i want burger bun and other receipies as shown in photos with out egg
It didn’t say where to add the Salt in your recipe? I left it out for fear of ruining the dough?
Oops! You add it with the rest of the dry ingredients. I’ve now fixed the recipe. My sincerest apologies!
These look amazing! Can these be frozen for a week or so? I have a party to cater for about 45 people and would prefer not to have to make them the day of as I will have a lot of other preparations to do.
Made these today……amazing and easy!
Hand mixed as no electric mixer and worked fine, added more flour as was too sticky. Will be making them again for sure.
Glad you enjoyed them, thanks for the comment!
I followed this recipe but what I seem to have is burger bun shaped scones.
I hand-kneaded the dough for at least 30 minutes :/
I followed this recipe but used 4cups of flour instead. They turned out great and perfect. Thanks for sharing.
I tried this recipe, and it turned out amazing! I tweaked it slightly, by adding a little bacon fat and less butter, fresh rosemary, lemon thyme, and garlic powder. They’re a huge hit in our house. Thanks for this one 🙂
It’s a great recipe.I’ve tried it and it turned out amazingly. THANKS FOR SHARING.
This recipe doesn’t ask for the Yeast to be activated. Does it require instant?
The yeast is activated by the warm water/milk/butter mixture. Hope this helps!
Just delicious every time, I’ve made these buns four times now and they’ve always come out well. The mixture can be difficult to handle if it is too wet, so just like the recipe advises keep adding a few extra spoons of flour until the dough begins to tear away from the side of the mixing bowl. Thank you!
I’ve made these buns twice already. They turned out great each time. Once I made it without milk cause coundnt get it at the moment and in both I’ve used lard instead of butter. The recipe calls for 420g of flour but each time I had to put 210g extra. Anyways…. they are great and so soft every time I make them. 🙂
The buns look great and I can’t wait to try out the recipe.. I was just wondering how many buns this recipe makes? Didn’t see it anywhere.. might’ve just missed it, but would be thankful for an estimate 🙂
Pilvi
Perfect! Making these tomorrow!
I found it interesting that you state that having a bun that is tasty enough for your burger is of utmost importance. My brother and I are having a big cookout at his house this month and we want it to be a memorable experience. I will send him this information so we can look into making some kaiser buns for the burgers.
These buns were incredibly delicious! I added some poppyseeds to the mix because, well, poppyseeds are everything. Also retarded the dough overnight in the fridge for more flavor. These had insane oven spring and were super soft and bouncy. Got lots of compliments on them. This recipe will go into my baking arsenal, thank you 😀
I really appreciate this wonderful post that you have provided for us. I assure you this would be beneficial for most people.
Burger Boxes
They came out great! Thank you
I am very glad to read your blog. Packaging is necessary for any kind of product especially for burger boxes if you need any kind of boxes in customized shape, size or layout you can contact with CustomBoxesU.
these were absolutely stupendous my 7 children and i enjoyed them however my husband left me because of this recipe he said his bun was flat but, on the Brightside, my 7 children really enjoyed this recipe the buns so were so hard i manages to throw it at my ex husband knocking him out.
Delicious! The only issue I had was that I made them too big, but that’s my own fault 😅
Haha! I think that is a common problem a lot of us have the first time we make burger buns. 🙂