How to Frost a Layer Cake
Learn how to frost a layer cake at home like a pro!
I’ve put off writing this post for years because I’ve felt like I’m not the most qualified expert when it comes to frosting and decorating cakes, even though I make them all the time. There are literally thousands of other tutorials out there from bakers who seem to know more. I haven’t worked in bakery and I don’t have a cake decorating business.
And then I thought that perhaps that’s my strength. I’m just like you!
I’m a gal who likes to bake cakes and I’ve learned over the years from watching others— and, more importantly through trial and error— how to make cakes more lovely and impressive. Frosting a layer cake isn’t that difficult or complicated, and knowing a few simple tricks can take your home-baked cake from basic to beautiful.
Come follow along, I’ll teach you what I know!
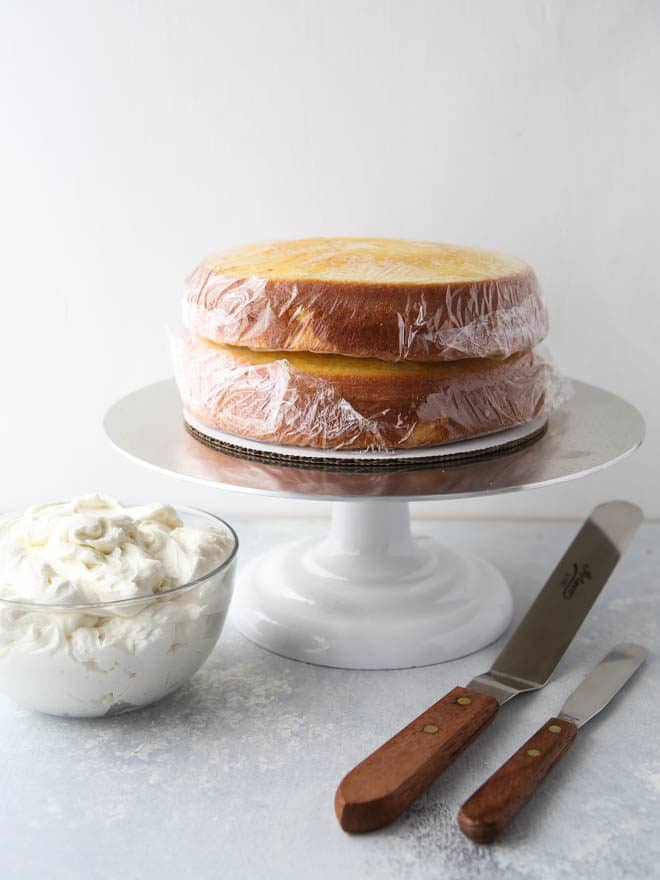
What you’ll need
Truth be told, you don’t need any special equipment to frost a layer cake, but a few specific tools can go a long way to making the task easier. Here’s what you’ll need:
(Disclosure: this post contains affiliate links.)
- Prepared cake layers— For best results, they should be chilled. See my tutorial on how to make and store layer cakes ahead of time. They should also be flat on top, remove any domes as needed (or see my tutorial on how to bake flat cake layers).
- Prepared frosting— For a standard 8 or 9-inch layer cake you’ll need 4-5 cups.
- Prepared filling— If you’re filling your cake with something other than frosting, such as fruit, chocolate, or whipped cream.
- A turntable— I love my beautiful Ateco turntable, but I used a much cheaper turntable for years with the same results. It makes frosting a cake so much easier!
- Cardboard rounds— For transporting frosted cakes from the turntable to the fridge and cake stand, etc.
- Offset spatula(s)— I use multiple offset spatulas of various sizes while assembling a cake, and highly recommend this set of 3 (S, M and L). If you’re going to invest in just one thing for cake decorating, let it be this! Also, straight spatulas are handy too.
Note: For this tutorial I used my vanilla buttermilk cake and whipped vanilla buttercream frosting.)
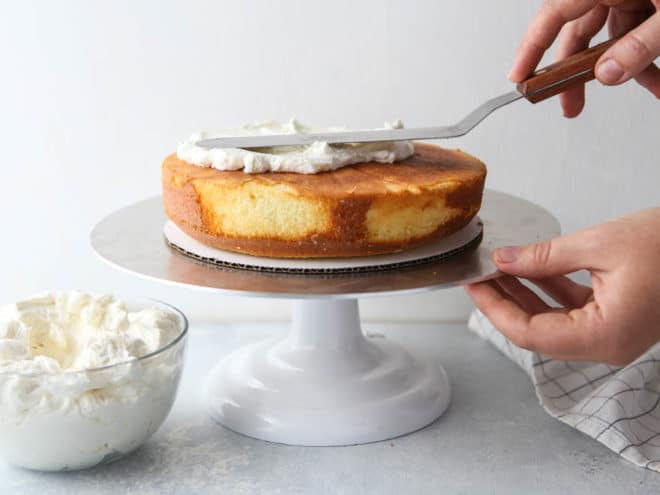
Stack and fill
Step 1— Place one cake layer top side-down on a cardboard round on top of your turntable, if using. Alternatively, place one cake layer top side-down on your cake stand or a plate.
Step 2— Spread frosting or filling on top. If you are using a soft filling like fruit preserves or lemon curd, etc., first build a “frosting dam” around the edge of the cake layer to hold the filling in place and prevent it from squishing out the sides when you add subsequent layers. You can use a piping bag and tip to pipe the dam, or just build up a wall with some frosting and a spatula.
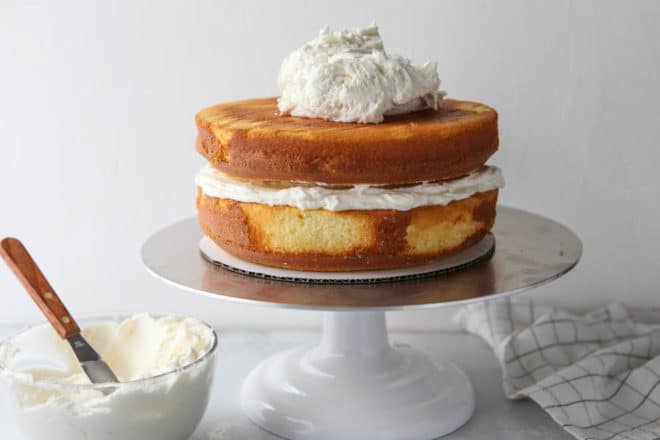
Step 3— Repeat with the rest of your layers. You can keep it simple with just 2 layers, or build a taller cake with as many layers as you’d like. You can easily get more layers by slicing your cakes in half horizontally.
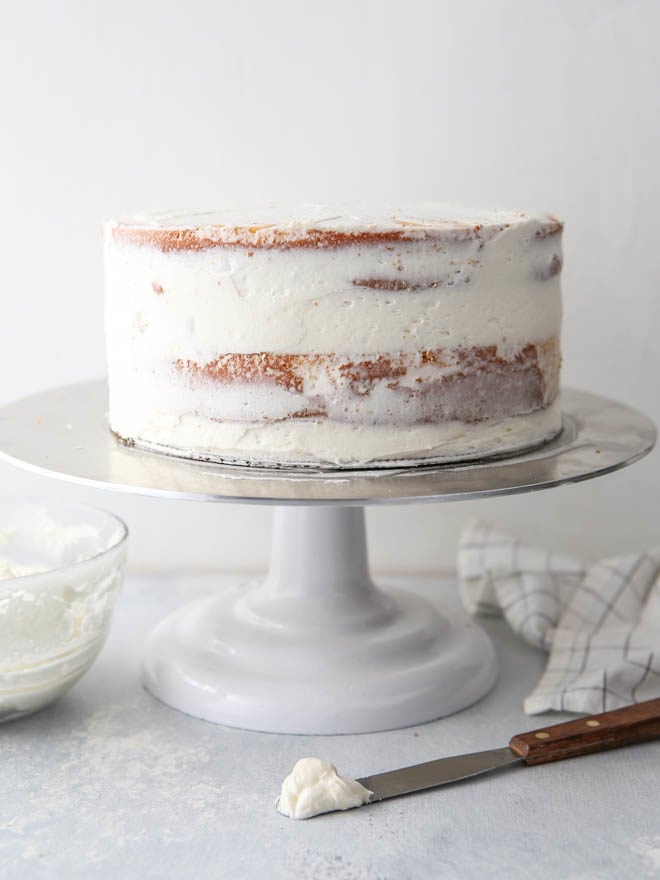
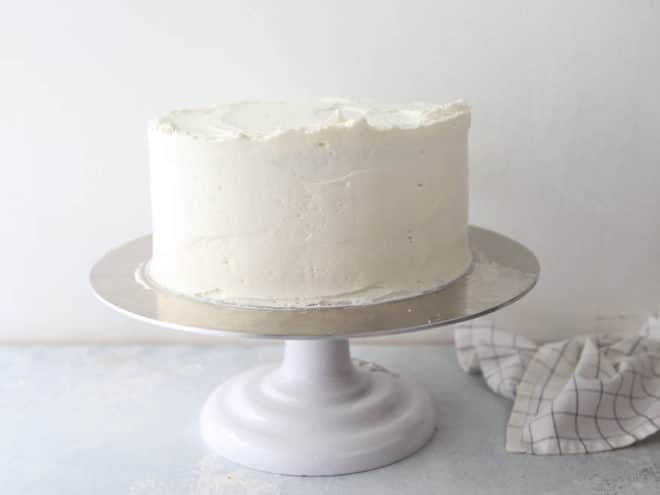
Apply a crumb coat
The one simple thing that home bakers can do to take their cakes to the next level is to use a crumb coat. It’s a game changer! A crumb coat is a base coat of frosting applied to the whole cake to seal in crumbs and even out the surface of your cake. This way the finished cake is smooth, even, and crumb-free.
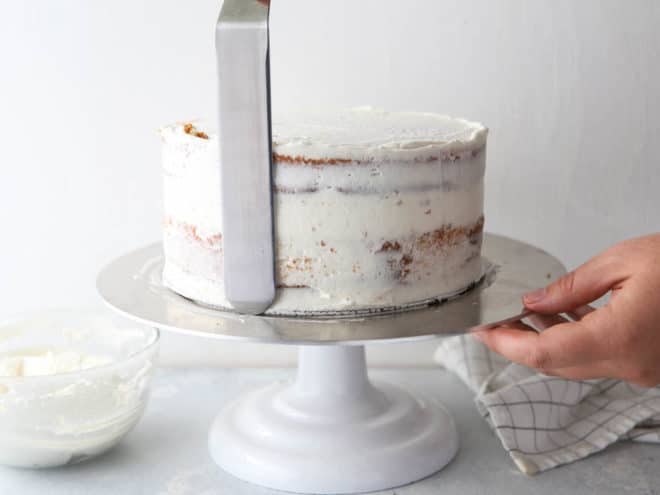
Step 4— Apply a thin coat of frosting over the whole cake. If your frosting is very thick, you may want to thin 1-2 cups of the frosting (depending on the size of your cake) with a little milk to use as your crumb coat.
I like to start at the top and then work my way down, filling in any gaps and evening out any uneven layers. Set an offset spatula perpendicular to your turntable or cake stand and glide it around your cake to create a smooth finish.
Note: If you’re a fan of the rustic “naked cake” look, then once you’ve applied the crumb coat you’re done! Simply chill, then serve.
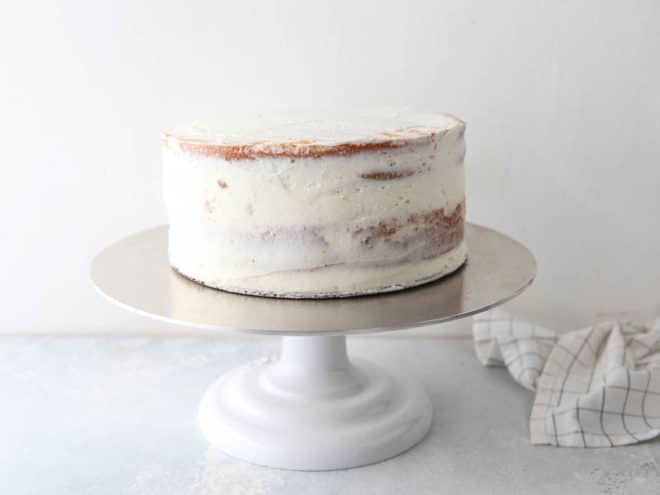
Step 5— Chill the cake for at least 20 minutes to set the crumb coat.
Note: It can be hard to fit a whole frosted cake + cake stand in the fridge, which is why I recommend using cardboard cake rounds. They make transporting layer cakes so much easier.
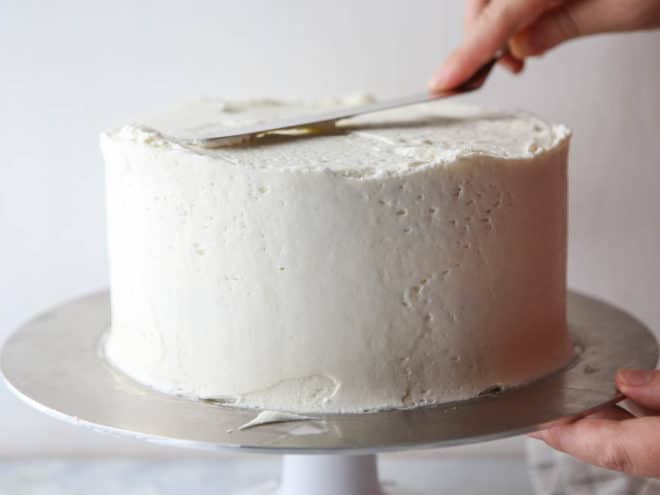
Apply final coat of frosting
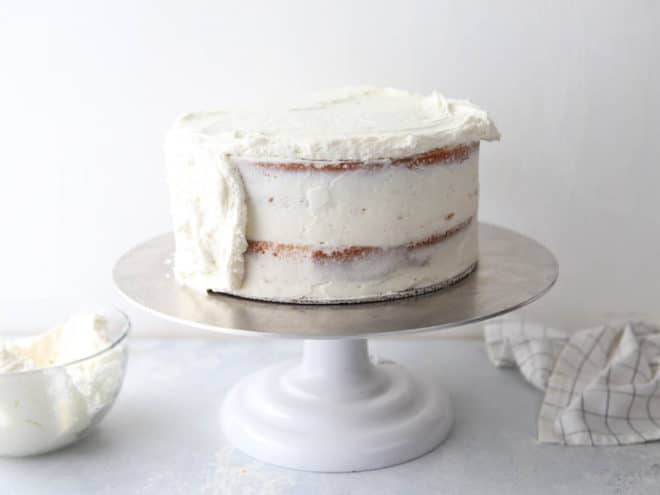
Step 6— Now you’re ready for your final coat of frosting! Again, I like to start at the top and work my way down. But unlike with the crumb coat, apply a generous amount of frosting.
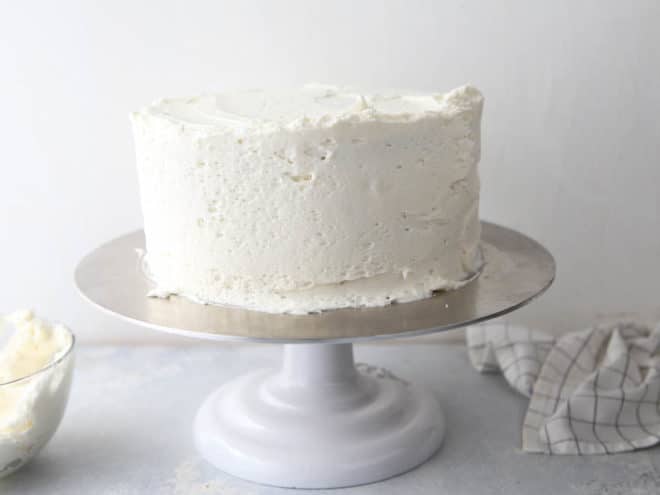
Once the cake is completely covered, smooth out the frosting with your offset spatula. Set an offset spatula perpendicular to your turntable or cake stand and use long, steady strokes to get a clean, smooth finish. I’ve seen lots of bakers use a bench scraper to smooth out the sides of their cakes, which is awesome, I’ve just always used an offset spatula.
To smooth out the top of your cake, take the edge of your spatula and drag it from the outside edge inward to the center. Wipe your spatula clean, rotate the cake, and repeat until you’ve gone all the way around.
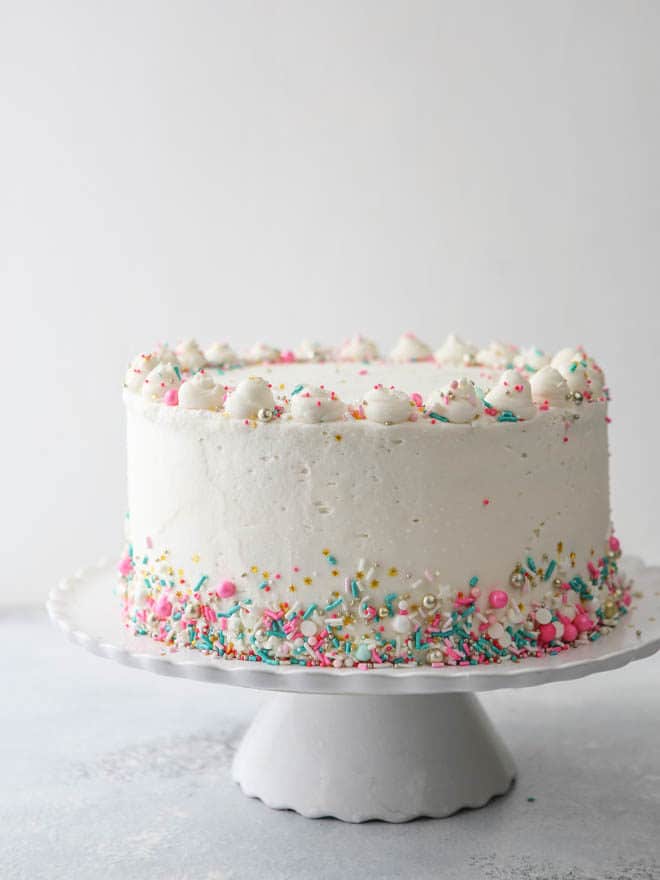
Decorate and serve
Step 7— You can decorate your frosted cake however you choose, with sprinkles, piped decorations, etc.
If you used a turntable, you can transfer the cake to a cake stand or plate now, or you can wait until you’re ready to serve.
Step 8— Chill for at least 30 minutes to set the frosting before slicing. If you are planning to transport your cake, chill for at least 1 hour to make sure it’s as firm as possible. Take it out of the fridge just before traveling.
I actually like to store all of my layer cakes in the fridge to ensure the frosting stays in place and to keep it safe and protected. Take it out of the fridge about 20 minutes before cutting so the frosting has some time to soften at room temperature.
And that’s it! You’ve done it!
Do you have any tried and true frosting tips you didn’t see here? I’d love to hear about it in the comments!
My favorite cake tools

I’m totally keeping this one bookmarked! looks like your sprinkle splurge totally paid off. 🙂
This is such a great tutorial and your cake is just beautiful…love those sprinkles!
I, too, love the sprinkles. Do you have a link to them?
BTW, I totally gave up trying to print the cake recipe on my smartphone — it simply wouldn’t work. Hopefully, I’ll be able to do so on my laptop!
Thanks.
The sprinkles are from Sweetapolita!
I’ve just tested the print button on that recipe on both my phone and laptop and both worked. Maybe try again?
This is so helpful. Thank you!! Where did u find those gorgeous sprinkles and also do you keep your cakes on cardboard when serving?
Yes, I serve the cake right off of the cardboard. And the sprinkles are from Sweetapolita. I found them at a baking supply store near me, but you can also get them online!
Genuinely loved this kind of post. Although I want much more information on like precious subject matter.
To store a finished cake, do you put your in the fridge with any kind of wrap on it? Will it keep in the fridge overnight okay? I’m thinking about trying to make a layer cake for the very first time…
No need to cover the cake with anything, it will store overnight in the fridge just fine! Good luck with you first cake, you can do it! 🙂
How did you apply the sprinkles to the bottom of you cake? Thanks!
My wedding is tomorrow (let’s hear it for waiting for the last minute) I am baking a red velvet cake with cream cheese and buttercream icing mixed together. Is there any way to make this soft icing thicker/stiffer so that it won’t squirt out the middle?
Frost cake with cold, chilled cake layers and frosting that isn’t too warm and soft. The frosting shouldn’t squish out the middle! Then chill it in the fridge after assembly and keep cold right up until serving time, or when cake needs to be out on display. Hope this helps!
Thank you for sharing this tutorial! I bookmarked it and have been going over each of the steps over and over so that I don’t mess up! I just did a crumb coat and am waiting for it to set in the fridge. So excited to be doing this for my son’s birthday!
Is it possible to post a video of this tutorial? I would love to see your frosting techniques. I searched your website and YouTube and did not see one. It would help for me to visually see you go through this.
Thanks again!
Thanks for the suggestions, I’ll see if I can make a video to go with this post.
This is a fantastic instruction, and your cake is stunning… I adore those sprinkles!