

How to Shape Dinner Rolls
Here are 4 ways to shape perfect dinner rolls! In this post you’ll learn how to make traditional round rolls, cloverleaf rolls, crescent rolls and knotted rolls. Use your favorite roll recipe, or feel free to use my go-to traditional soft buttery roll recipe.

You can’t go wrong with classic round dinner rolls, but sometimes it’s fun to switch things up! If you’re looking to elevate your dinner roll game, then you have come to the right place. I’ll show you how to shape traditional rolls, as well as crescents, knots, and cloverleaf rolls.
Let’s dive in, shall we?
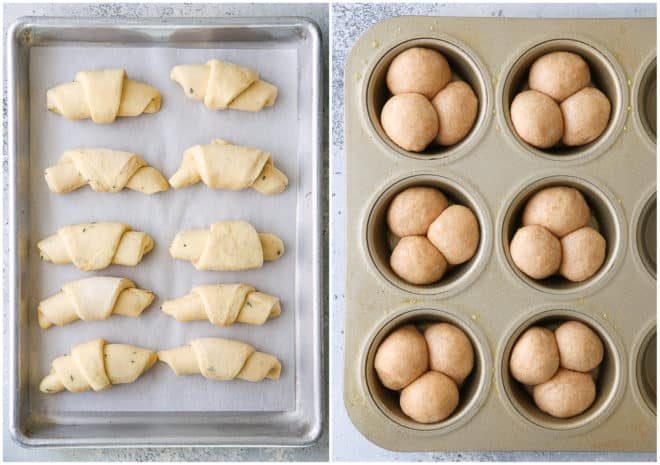
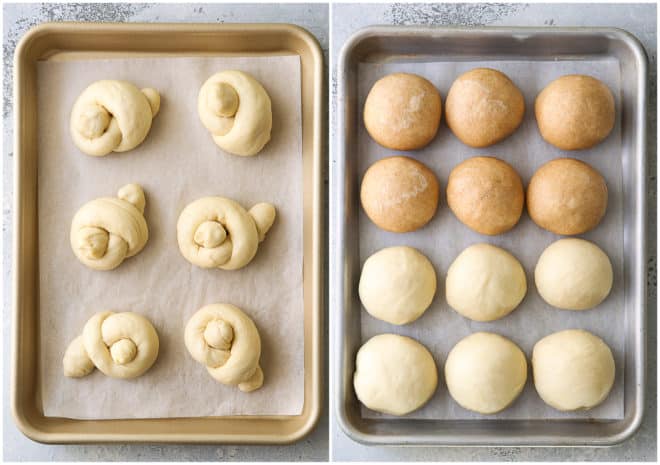
How to shape dinner rolls
- Make sure to start with a really great roll recipe. Feel free to use mine!
- Once the dough is ready, portion rolls so they’re the same size. This means they’ll all look the same and bake evenly.
- Next, choose your desired shape. I’ll break down each one below.
- Bake and enjoy! All of these options bake up beautifully and would be a delicious accompaniment to any meal.
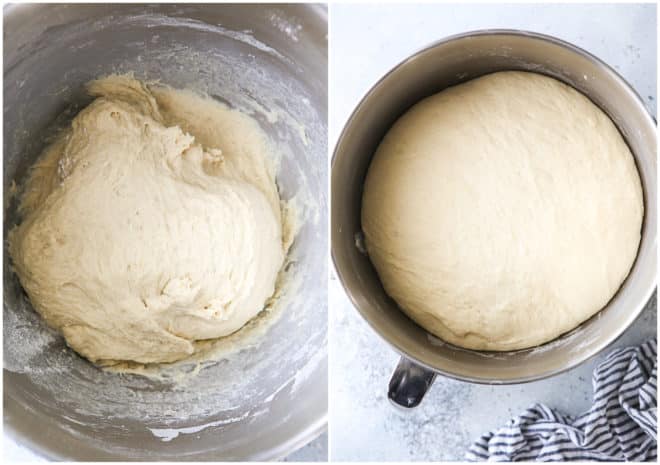
1. Start with a great roll recipe
This article was written in combination with my Ultimate Dinner Roll Recipe. It includes my favorite roll recipe, which makes the best soft, tender and buttery rolls. (You’ll also find different possible flavor variations, baking tips and more!)
However, if you have a roll recipe you’d like to use instead, go for it! Once you have a recipe selected, you’ll need to make and proof the dough according to the recipe instructions.
baking tip:How to help your dough rise faster
- Oven: Heat your oven to its lowest setting for a few minutes, then turn it off. Place the covered dough on the center rack and close the door.
- Microwave: Heat 1 cup of water in your microwave for 2 minutes. Remove water and place the covered dough in the microwave and close the door.
- Other: I’ve also risen bread on top of a warm oven, running dryer machine, and even on a chair set over a heater vent.
2. Divide dough evenly so your rolls are the same size
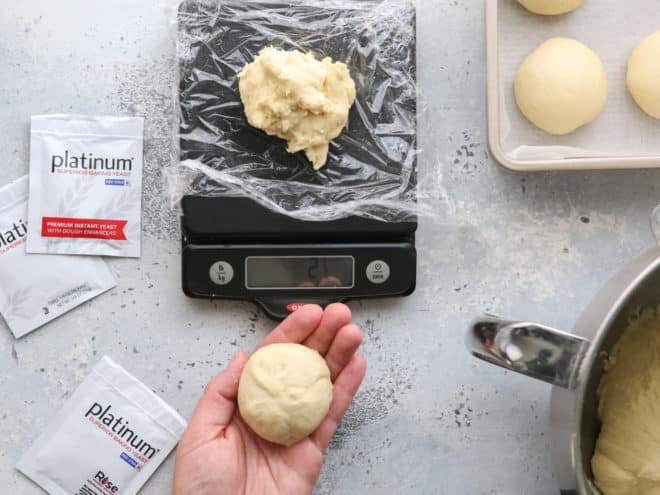
Regardless of what shape you want your rolls, I always first make sure all my rolls are portioned to be the same size. This way they look better and will bake more evenly.
- First, weigh all of your dough using a digital kitchen scale if you have one.
- Divide that number by 12 (about 2 ounces for each roll if I use my standard dinner roll recipe).
- Divide dough into 12 pieces with a bench scraper and use the scale to make sure they’re the same size, making adjustments as needed.
Now you’re ready to shape your rolls!
3. Choose your desired shape
While there are so many different ways you can shape and bake dinner rolls, we’re going to focus on a few favorites. First up, traditional round rolls. You can’t beat this classic!
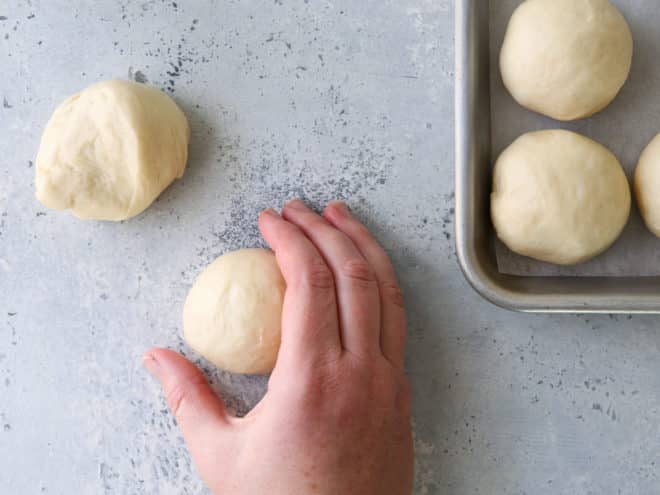
How to shape traditional round dinner rolls
- Stretch and pinch: Take portioned dough in one hand and use your fingers of the other hand to pull and stretch the dough over itself so the top is smooth, pinching it at the bottom.
- Roll until smooth. Place it pinched side-down on an unfloured surface and cup your hand around it, with the edge of your hand firmly on the counter. Sweep your hand in a circle around the dough, gently dragging and shaping it into a smooth round ball as you go. This should only take a few seconds.
- Arrange rolls for baking. Place in a 9×13-inch pan or quarter sheet pan lined with parchment paper.
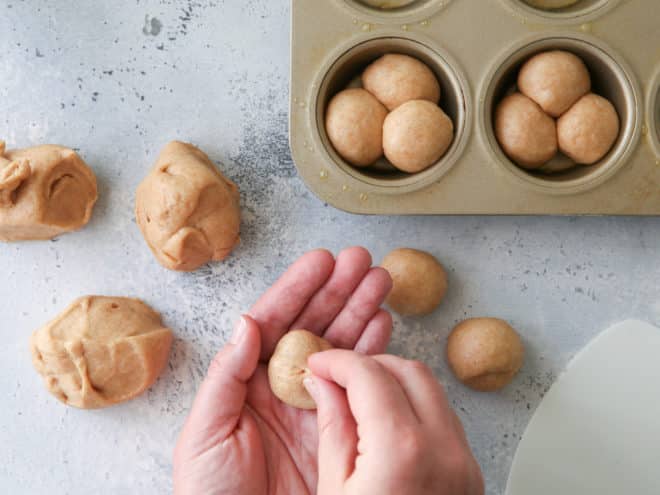
How to shape cloverleaf rolls
- Divide into 3. Use a bench scraper to portion each round into 3 smaller portions.
- Stretch, pinch and roll. Shape each portion the same as traditional round dinner rolls (above), using your fingers to smooth out the tops and pinch the bottoms, and finish by smoothing it out on the counter.
- Arrange rolls for baking. Place 3 small rounds into each cup of a greased muffin pan.
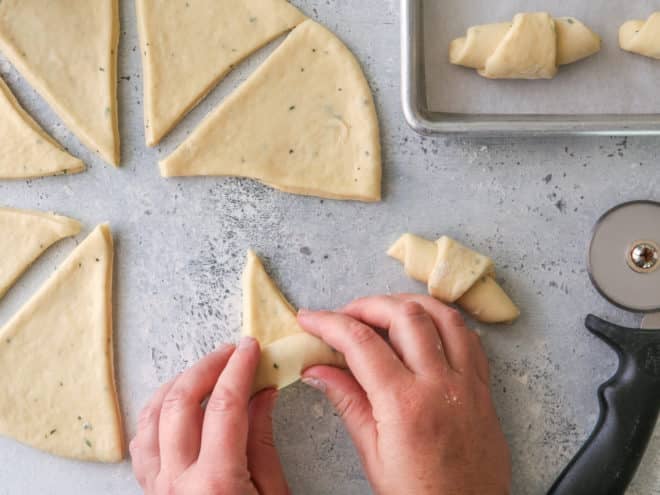
How to shape crescent rolls
- Roll out dough. Instead of dividing dough into 12 portions, divide in half and roll each out to about ½ inch thick.
- Slice and roll. Cut each into 6 equal triangular pieces. Starting at the large end, roll the dough up so that the pointed end is on the bottom.
- Arrange rolls for baking. Place on a regular sheet pan lined with parchment paper and curve into a crescent shape if desired.
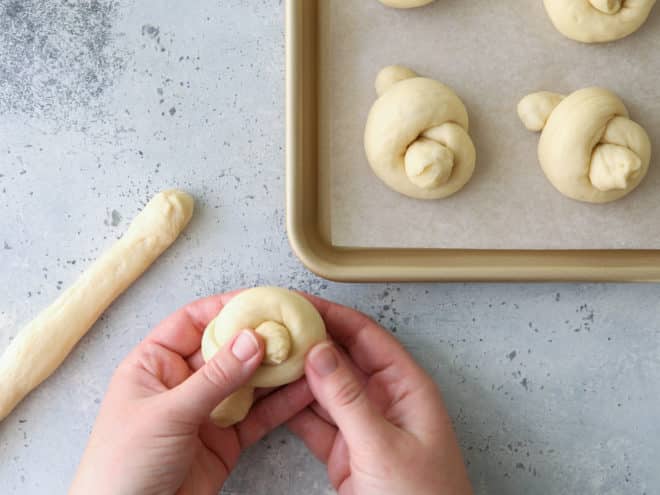
How to shape knotted rolls
- Form into a rope. Roll and stretch each portion of dough into a rope about 6-8 inches long. If the dough resists stretching, cover with plastic and let it rest for 5-10 minutes, then try again.
- Tie a knot. Use both hands to form the rope of dough into a knot.
- Arrange rolls for baking. Place on a regular sheet pan lined with parchment paper.
Now that your rolls are beautifully shaped, all that’s left is to let rise one more time and bake! For my full dinner roll recipe, and more tips for baking the best rolls, see my Ultimate Dinner Roll Guide.

Additional roll tips
- Cover rest of the dough with a clean kitchen towel or sheet of plastic wrap to prevent them from drying out while you shape the rolls.
- Using a kitchen scale isn’t necessary, but it helps so much making sure each dinner is the same size and will bake evenly.
- Flour your hands and work surface lightly with flour as needed if the dough is very sticky. However, I find that having just a bit of grip from an unfloured surface actually helps the shaping.
- Use a gentle touch when shaping the dough to maintain its lightness, you don’t want to deflate their rise.
- Practice makes perfect! Don’t be discouraged if the first few rolls come out wonky, or if it feels difficult. The more rolls you make, the easier it will be and the more confident you will feel!
More roll recipes
- Easy No-Knead Fairy Crescent Rolls
- Soft White Dinner Rolls
- Honey Whole Wheat Dinner Rolls
- Garlic and Herb Crescent Rolls
- Potato Dinner Rolls
Disclosure: This post was first published in November 2021 in partnership with Red Star Yeast. All opinions are my own, as always. Thank you for supporting partnerships with brands I believe in.

This is such a helpful guide! Love that you broke down four different shaping techniques with clear step-by-step instructions. The tip about weighing dough for even sizing is brilliant – makes such a difference in how they bake. The warming tricks for cold kitchens are lifesavers too. Can’t wait to try.
A question. i want to try to make heart shape dinner rolls using the rhoades from rolls. Can I put them in a muffin tin with a sm balled up piece of foil and put in dough to make a heart shape? Or will it rise up over the foil and not make heart shape at all. Thank you for your help