

Easy No-Bake Crème Brûlée
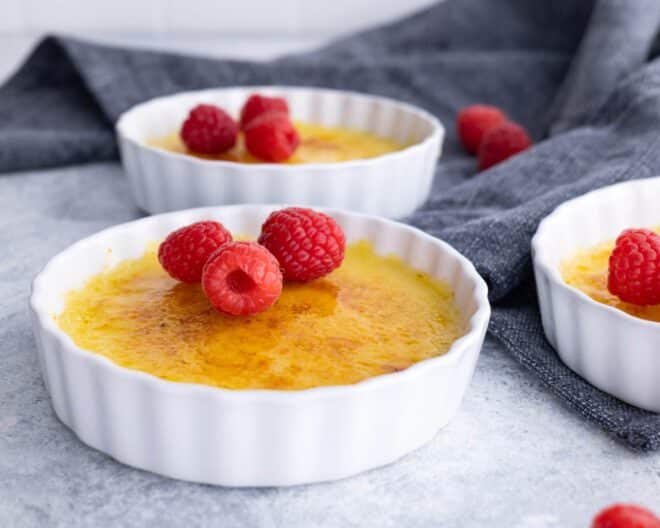
This elegant no-bake crème brûlée is creamy, rich, and perfect for special occasions or any night of the week. Plus, it’s easy enough for anyone to make at home!

Crème brûlée is a classic French dessert I used to only order at fancy restaurants. It’s made by baking individual dishes of delicate custard inside a water bath in the oven, which felt a bit tricky to pull off at home.
But not anymore! This no-bake version skips the oven entirely and still yields the rich, silky texture you expect from classic crème brûlée. I make it all the time now for special occasions, and my kids even ask for it on birthdays and holidays. They love helping with the caramelized topping!

“I made this for a dinner party last night and everyone loved it. I don’t have time for complicated recipes and always look for shortcuts that offer amazing results. This certainly ticks all the boxes. Hubby made a point of telling me to save this recipe (and he is fussy!). Thanks so much.⭐⭐⭐⭐⭐” —from reader Debs
You should try this crème brûlée because…
- Crème brûlée is irresistibly indulgent, and a classic for good reason!
- This recipe is just as rich and creamy, but without the fuss.
- You only need simple ingredients and about 20 minutes of active work.
- It’s perfect for beginners!
- It’s a great make-ahead dessert with big wow factor for guests.
- You can use your broiler if you don’t have a kitchen torch.
Why this recipe works
The main difference between my recipe and the real thing is that I’ve added extra thickener (both cornstarch and egg yolks) so it doesn’t require baking to set the custard. It’s basically vanilla pudding, but once chilled and finished with its signature brûléed topping, you won’t be able to tell the difference!
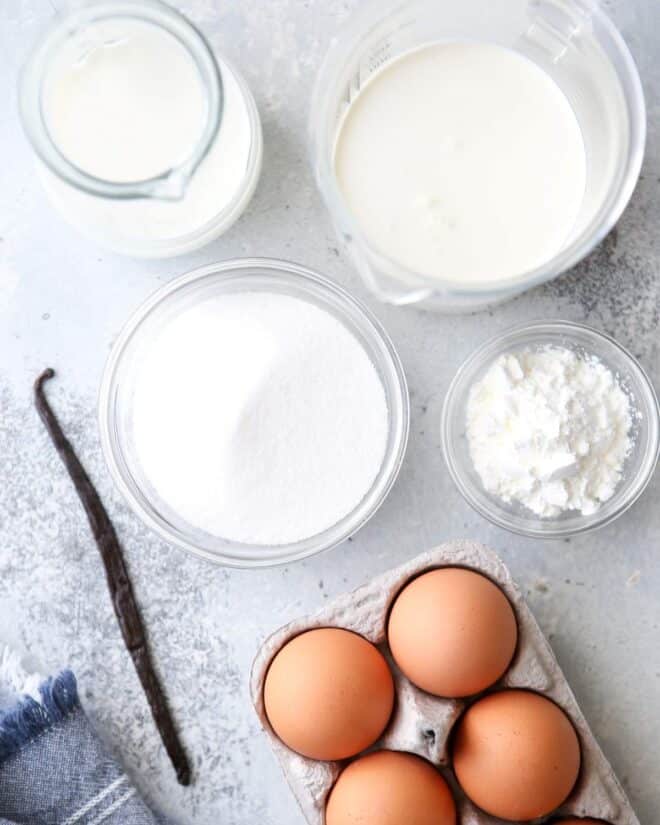
Ingredients you’ll need
- Heavy cream and whole milk: Using both produces the best richness and silky texture.
- Granulated sugar: Sweetens up this dessert.
- Vanilla bean, vanilla extract or vanilla bean paste: All are great options, though the flecks from using a whole vanilla bean or vanilla bean paste make it look extra special.
- Egg yolks and cornstarch: To set the custard mixture.
Crème brûlée works best with wide and shallow individual serving dishes so you get the perfect ratio of creamy custard to caramelized topping. Ramekins are the classic choice, but you don’t have to use them. I also recommend a kitchen torch, though I have instructions below for using your oven broiler instead.
How to make no-bake crème brûlée at home
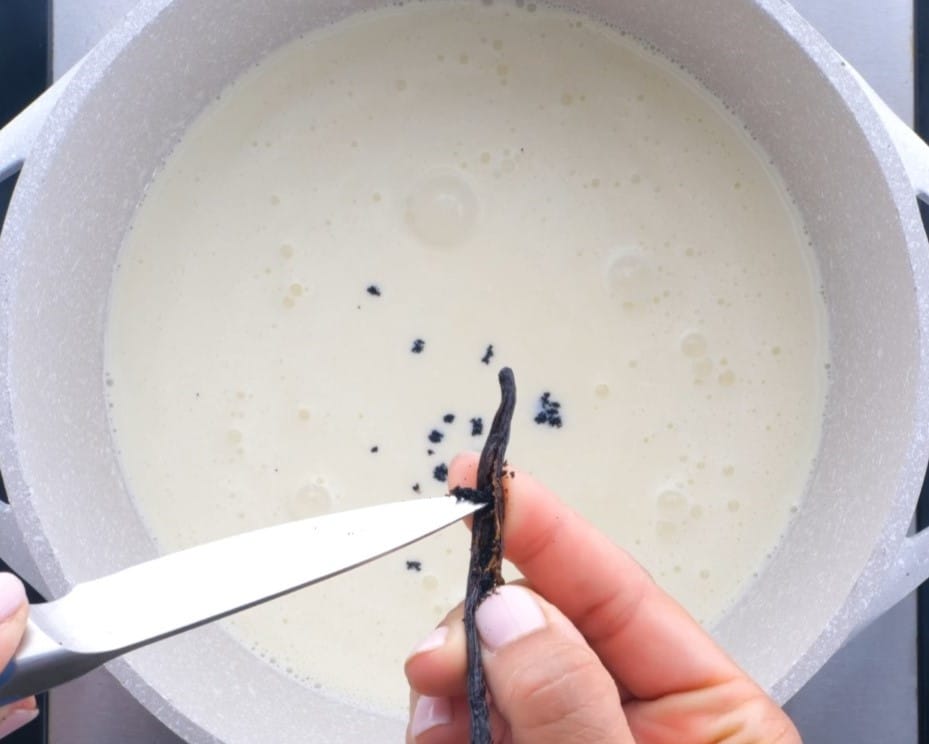
- Heat cream, milk and sugar. In a saucepan, warm cream, milk, and sugar with the vanilla bean until bubbles form around the edges.

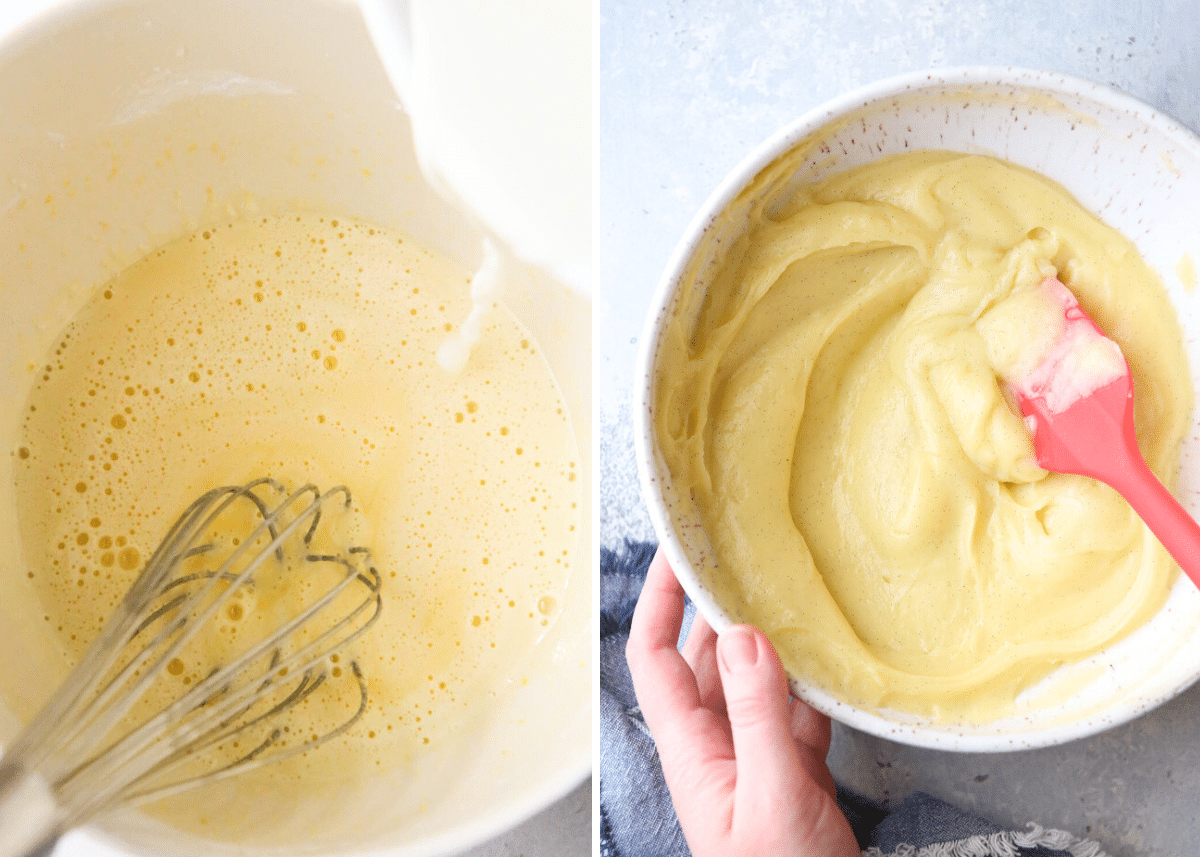
- Temper the eggs and cornstarch. Whisk egg yolks and cornstarch in a bowl. Slowly add the hot cream mixture while whisking so the eggs don’t scramble.

- Cook custard till thick. Return mixture to the saucepan and stir over medium heat until thick.
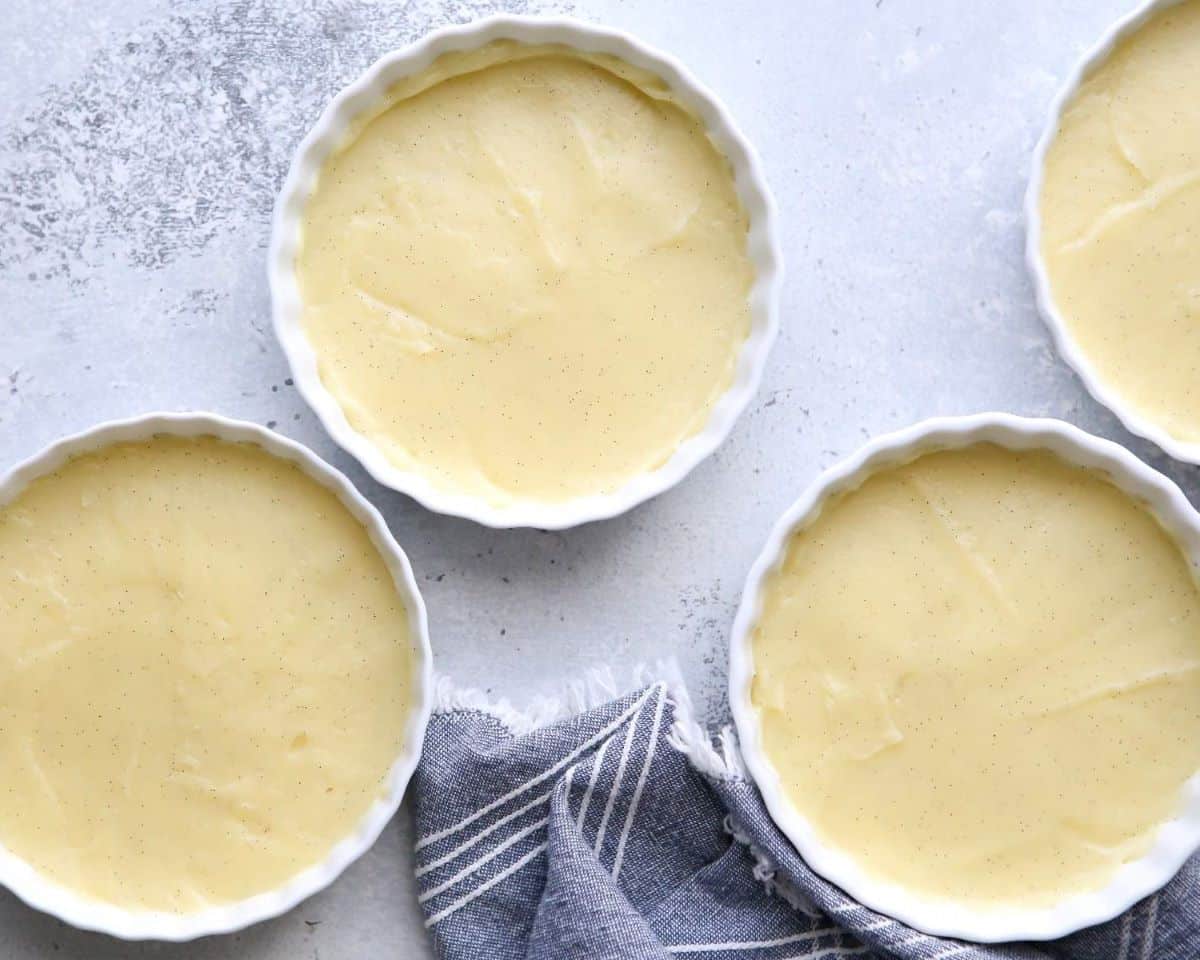
- Strain and chill. Strain custard through a mesh sieve to remove lumps, then divide into ramekins and chill uncovered for at least 2 hours.

- Top with sugar and caramelize. When you’re ready to serve, sprinkle an even layer of sugar on top, then torch or broil it until golden brown.
- Serve immediately. And enjoy!

baking tip:Brûlée torching tips
Here are a few tips to getting a perfectly brûléed dessert, with a crisp, perfectly golden, caramelized shell:
- Completely chill your custard, or whatever dessert you plan to brûlée.
- Do it right before serving so it’s as crisp as possible.
- Cover the entire surface of your dessert with a thin, even layer of sugar.
- Pass a kitchen torch evenly over the surface, pausing just long enough as needed to melt and caramelize the sugar without burning it.
- Serve and enjoy immediately!
More special homemade treats
- Molten Chocolate Cakes for Two
- Chocolate Zabaglione (Chocolate Wine Sauce)
- Brownie Bottom Mini Cheesecakes
- Flourless Chocolate Almond Cake
This recipe was originally published February 2014. Instructions have been clarified, but it’s still the same recipe we’ve been enjoying for over 10 years!
Get the recipe

Easy No-Bake Crème Brûlée
Ingredients
- 1 cup (227 grams) heavy whipping cream
- ½ cup (113 grams) whole milk
- ½ cup (100 grams) granulated sugar
- 1 vanilla bean , split lengthwise (see Notes)
- 4 (56 grams) large egg yolks
- 2 tablespoons (14 grams) cornstarch
- Additional granulated sugar , for the caramelized topping
Equipment


Instructions
- In a medium saucepan, combine the cream, milk and sugar. Use a sharp knife to scrape the vanilla beans from the pod and add to the saucepan. Place over medium heat and stir to dissolve the sugar. Heat just until bubbles appear at the edges and mixture is steaming (do not bring to a boil).
- Meanwhile, whisk together the egg yolks and cornstarch in a medium bowl. Add the hot cream mixture in a slow steady stream while whisking constantly.
- Pour mixture back into the saucepan and return to medium heat. Cook, stirring constantly with a spatula to scrape the bottom, until mixture just comes to a boil and thickens. This will take 3-5 minutes, increase heat if needed. Once thickened, cook for an additional 1 minute, while continuing to stir.
- Remove from heat and pass custard through a mesh strainer to remove any lumps (mixture may seem grainy, but don't worry the end result is smooth and creamy). Spoon into 4 individual ramekins or bowls and spread into an even layer. Place in the fridge uncovered (so steam doesn't get trapped and create condensation) to set up completely, at least 2 hours.
- When ready to serve, sprinkle the tops generously with granulated sugar.
- To caramelize with a kitchen torch (recommended): Work with one at a time, passing the torch evenly over the surface until the sugar melts and caramelizes. This takes less than a minute per serving.
- To use an oven broiler instead: Place the oven rack on the highest setting, put the ramekins directly under the broiler, and set it on high. Wait for the sugar to melt and caramelize, rotating the ramekins as necessary for even browning. This can take up to 5 minutes. Watch so they don't burn.
- Serve immediately and enjoy!
Video
Notes
- You may substitute 1 tablespoon vanilla extract or vanilla bean paste for the vanilla bean. After the custard has thickened, remove from the heat and stir in the vanilla before passing through a mesh strainer.
- If you don’t have ramekins: Use wide shallow individual dishes for the best ratio of filling to topping. Wide mouth jars are an option, or shallow 4-inch bowls. You can also use a 9-inch by 1-inch deep pie dish and serve it family-style with 4 spoons.
- Make ahead instructions: Can be made up to 48 hours in advance and stored in the fridge. Cover with plastic wrap after it’s completely chilled (about 2 hours). Brûlée topping just before serving.


I didn’t see in the recipe how many ramekins this fills.
It’s indicated in the yield— 4 ramekins. But I’ve now added it to the instructions as well so it’s more clear. Sorry for the confusion!
This is regular custard. I did this recipe tonight. I found it very sweet. I would put about 1/3 of the sugar and increase the milk to a full cup. This was exceptionally thick. I think I might play around with the amount of starch too. This is a sweeter version of the custard I make for trifle…. without the additional butter.
Thank you for this comment and feedback! Yes, it is a custard recipe and it’s meant to be thick so it doesn’t require baking.
So delicious! I made this in a pinch when I needed a dessert to take to a friend’s house. Even with the substitutions I made (like converting skim milk to buttermilk), it was delicious and a big hit. Will definitely be making again!
Yay! Thanks so much for the feedback and recipe rating Sydney.
Can I replace vanilla extract with honey?
I have never used honey in this recipe, but I imagine you could add a small amount for flavor. I would still include vanilla extract though. You may also consider adjusting the sugar amounts, but I haven’t tested it.
I would like to put into a pie dish for a larger but pretty presentation. How would I justify the ingredients for that? Thanks.
I haven’t tried that before, so I couldn’t say. Sorry I can’t be more help! Sounds like a fun idea though. I think I’d just make the recipe as written and spread into the smallest pie dish you have (8 or 9-inch).
I was wondering if these can be frozen once in the ramekins? I’m prepping for a wedding and will be making a large batch. I’d like to make them 4 days ahead and freeze. The sugar would be added on the day of.
The recipe is perfect by the way. Made a small batch to try.
Thank you.
Yeah, I think that will work? Haven’t tested it myself though. Since this is for such an important event, I’d recommend testing everything ahead of time. Make a single batch and test to make sure it’ll work to freeze, thaw, brulee and serve. 🙂
Can we use sugar substitute for this amazing recipe?
I haven’t tested it with a substitute so I couldn’t say for sure either way.
Brilliant! I was looking for a quick/easy recipe and saw yours. I used half the sugar and replaced it with stevia I also only used 1 1/2 Tbsp of cornstarch I finished off the cooking in microwave doing 20 sec bursts rather than pour it back into saucepan. I was scared of it catching on the bottom. Did not have to put it through sieve. Will definitely be making it again – Thank you
Such a great, quick version and really delicious! I only had potato starch not corn starch but one tablespoon of that worked really well. Next time I might go for 80g of sugar too.
Love it though, sure this will be a regular, thanks!
I made this for a dinner party last night and everyone loved it. I entertain a lot, I also run a couple of businesses so time is precious. I don’t have time for complicated recipes and always look for shortcuts that offer amazing results. This certainly ticks all the boxes. Hubby made a point of telling me to save this recipe (and he is fussy!). Thanks so much.
I love Creme Brulee, but make it rarely.
That’ll change with this easy peasy way to do it!
Thanks!