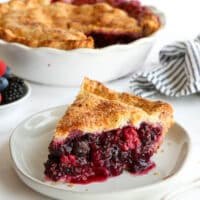
Summer Berry Pie
This classic triple berry pie combines raspberries, blackberries, and blueberries with buttermilk crust for the perfect balance of sweet-tart flavor, juicy berry filling, and flaky pie crust.
Ingredients
Buttermilk Pie Crust:
- 2 ½ cups (315 grams) all-purpose flour
- 1 cup (227 grams) cold butter , cut into 1-inch pieces
- 1 tablespoon granulated sugar
- 1 teaspoon salt
- ½ cup (113 grams) cold buttermilk , well-shaken
Berry Filling:
- 1 cup (200 grams) granulated sugar
- 2 tablespoons cornstarch
- 2 tablespoons instant/minute tapioca , or tapioca flour
- 1 tablespoon lemon zest
- ¼ teaspoon salt
- 3 cups (425 grams) blueberries
- 2 cups (230 grams) raspberries
- 2 cups (285 grams) blackberries
- 1 large egg , lightly beaten (for egg wash)
- 2 tablespoons sanding sugar (optional topping)
- Vanilla ice cream ,for serving (optional)
Equipment

Instructions
To make the buttermilk pie crust:
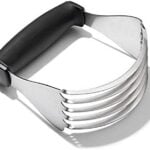
- In a large bowl, stir together the flour, sugar and salt. Add the butter and cut into the dry ingredients with a pastry blender or knife until pieces are the size of peas.
- Add the buttermilk and stir to make a shaggy dough. Dump the mixture out onto a clean counter and use your hands to bring it together. Add more buttermilk a tablespoon at a time, if necessary. (but it's okay if it's on the dry side).
- Form into two equally sized disks. Wrap in plastic wrap and chill in the fridge for at least one hour or up to 3 days.
To prepare the filling and assemble the pie:
- Preheat oven to 450°F. Line a sheet pan with parchment paper (this will catch any juices that spill over as the pie bakes).
- When ready to make the pie, unwrap one of the chilled disks of dough and roll out to about ¼ inch thick on a well-floured surface. Transfer to a pie dish, trim the crust to about ½ overhang and chill until you're ready for it. Meanwhile, roll out the second disk.
- Roll out the second disk and have it ready to go on your counter.
- In a bowl, combine the sugar, cornstarch, instant tapioca, lemon zest, and salt. Add the berries and toss gently until covered. Pour into the prepared chilled pie crust.
- Cover with the second crust and pinch the edges together tightly to seal, and crimp into a fluted pattern. Brush with the beaten egg and sprinkle with the sanding sugar. Cut 3 vents in the center of the crust to allow steam to escape.
- Place pie on the prepared baking sheet and bake at 450°F for 10 minutes. Reduce oven temperature to 375°F and bake for an additional 30-40 minutes, or until crust is golden brown and juices are bubbly in the center. If the crust browns before the filling is ready, cover with foil.
- Cool 3 hours, or until pie is room temperature. (This ensures pie filling has thickened properly). Slice and serve with vanilla ice cream, if desired.
- Store pie covered with plastic wrap at room temperature for up to 24-48 hours max, or in the fridge for up to 5 days.
Notes
- Use frozen berries: Do not thaw before mixing the filling and increase tapioca amount to 3 tablespoons.
- If you want to serve the pie warm: Let the pie cool, then cover with foil and warm in a 350°F oven for 30 minutes.
- To freeze pie: Let it cool completely, then cover in a layer of foil followed by a layer of plastic wrap. Store in the freezer for up to 2 months. Thaw overnight in the fridge, then remove the plastic wrap and warm in a 350°F oven for 30 minutes (this helps crisp up the crust and return it to its flaky texture).
- Adapted from The Gourmet Cook Book.
Calories: 546kcal, Carbohydrates: 77g, Protein: 7g, Fat: 25g, Saturated Fat: 15g, Polyunsaturated Fat: 1g, Monounsaturated Fat: 6g, Trans Fat: 1g, Cholesterol: 83mg, Sodium: 572mg, Potassium: 225mg, Fiber: 6g, Sugar: 36g, Vitamin A: 881IU, Vitamin C: 22mg, Calcium: 56mg, Iron: 3mg

Have you tried this recipe?I’d love to hear about it! Leave a rating and review below, or take a photo and tag it on Instagram @completelydelicious with #completelydelicious.
